infra CONVERT
blue DAT • infra DAT
mdm TOOL
infra CONVERT
blue DAT • infra DAT
mdm TOOL
| Step | Action | Result | |
|---|---|---|---|
| 1 | Open drawing sheet | Open the drawing sheet that you would like to stamp. | The drawing sheet is displayed in the drawing window. |
| 2 | Activate stamp tool | Click on the Stamp tool button ( | If you now move the mouse pointer into the drawing window, it will be displayed as a stamp (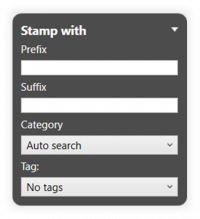 |
| 3 | Check/set start value for the numbering | 1) Set the start value in the Stamp-with dialog or in the Characteristic overview window. You can use the three-dot button in the Stamp number field to set the start value or the next free number via a context menu. | 1) The starting value is fixed. |
| 2) Define further properties in the Stamp with dialog: • Prefix and suffix as a supplement for the stamp text • Category • Tag • Tolerance table and class for generally tolerated dimensions | 2) The properties are fully selected. | ||
| 4 | Define characteristic position | Move the mouse pointer (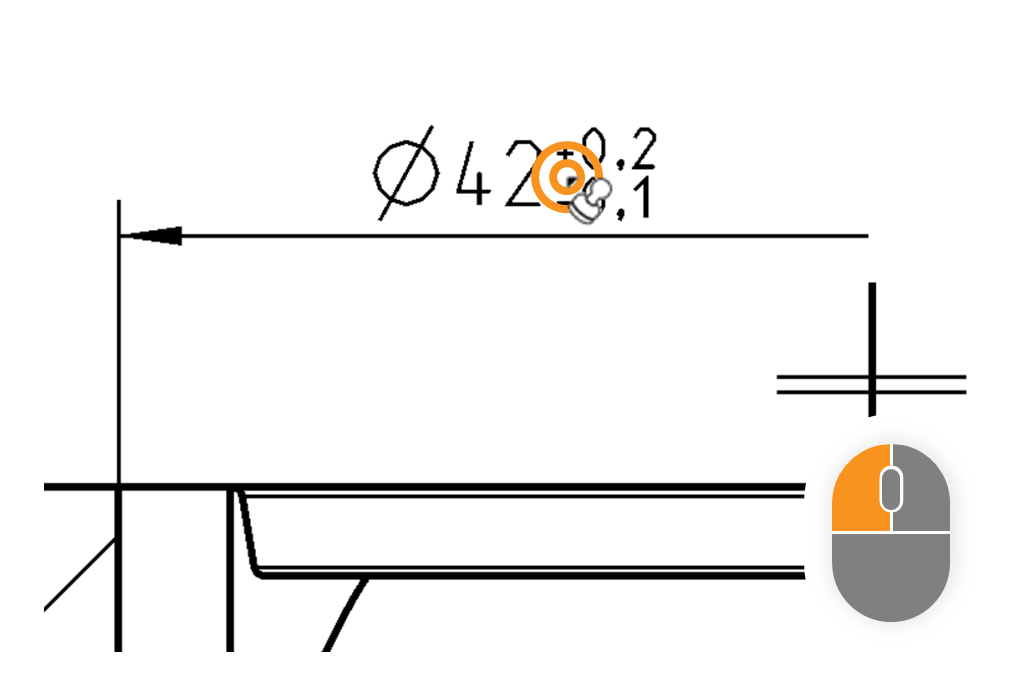 | The “Create new characteristic” quick entry dialog opens: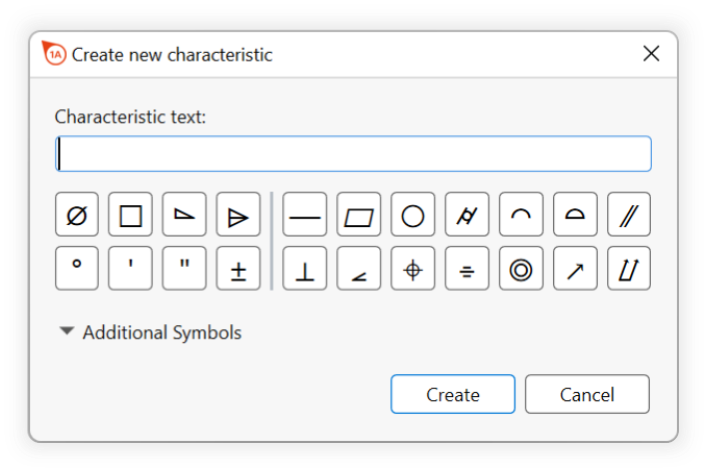 Note The figure shows the quick entry dialog as of program version 3.1.0. |
| [Alternatively] Quick stamping | As an alternative to steps 4 to 6, you can create a characteristic without characteristic text if, for example, you only want to mark an item with a stamp or if you do not want to define the characteristic properties until later. | ||
1) Move the mouse pointer to the characteristic position, press the Shift key on the keyboard, hold it down and double-click with the left mouse button. (Tip: You can also use the Caps Lock key if you want to create several characteristics.)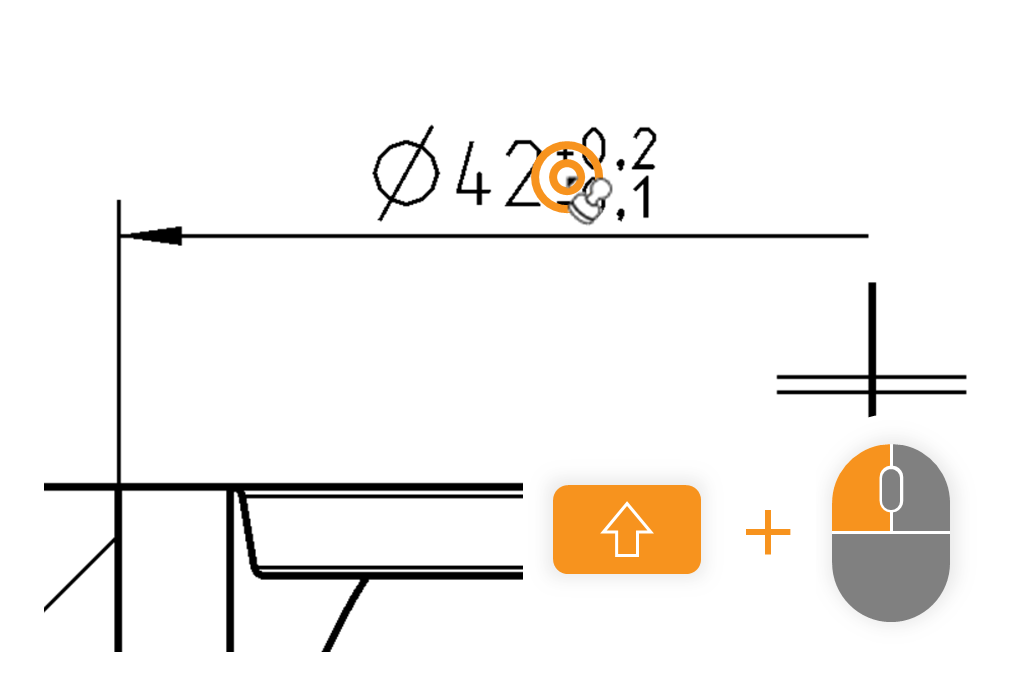 | 1) An attributive characteristic of the class “Word specification” is created. | ||
| 2) The stamp is not yet anchored, but still coupled to the mouse pointer. Move the mouse pointer over the drawing surface in such a way, that the stamp is positioned and oriented as required. Then use the left mouse button to click just the once. | 2) The stamp is now linked to the drawing. | ||
| 5 | Enter characteristic text | Enter the relevant characters of the characteristic in the “Characteristic text” field using the keyboard. You can insert graphic symbols at the cursor position using the buttons below. | By way of example, a characteristic of the specification elements “⌀42”, an upper deviation of “0.2” and a lower deviation of “-0.1” is applied. Click on the ⌀ button and enter the text “42 +0,2 -0,1”: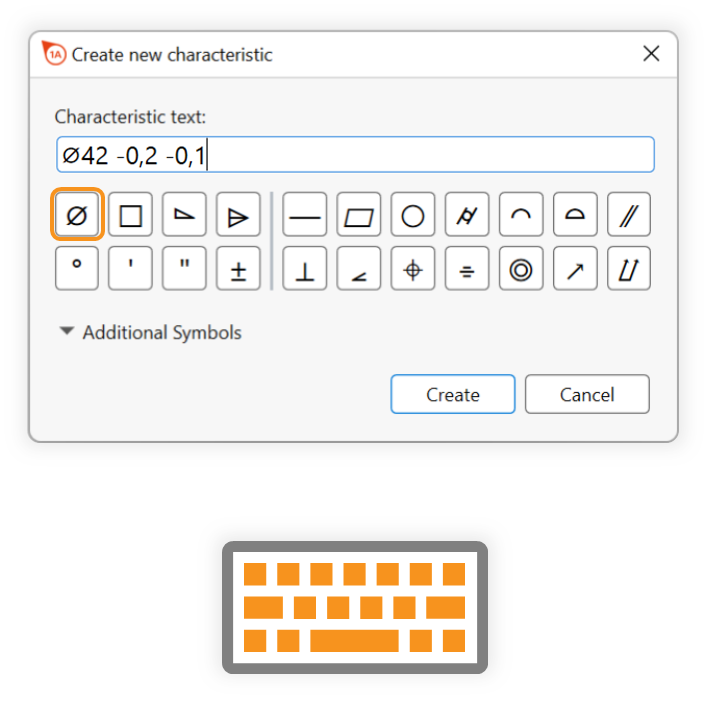 |
| [Alternatively] Create characteristic without text | Alternatively, you can create a characteristic without characteristic text if, for example, you only want to mark an item with a stamp or if you want to define the characteristic properties later. | ||
| Leave the input field empty and click directly on Create or press the Enter key on the keyboard. | An attributive characteristic of the class “Word specification” is created. | ||
| 6 | Create characteristic and position stamp | 1) Click on Create or press the Enter key on the keyboard. | 1) The characteristic is created, but the stamp is not yet positioned. |
2) Move the stamp to the desired position and click the left mouse button to confirm the position.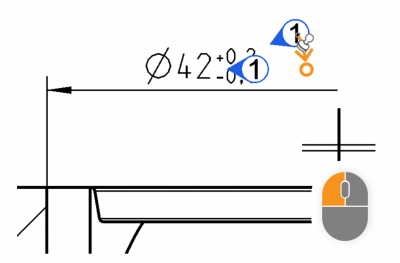 | 2) The stamp is now anchored on the drawing sheet.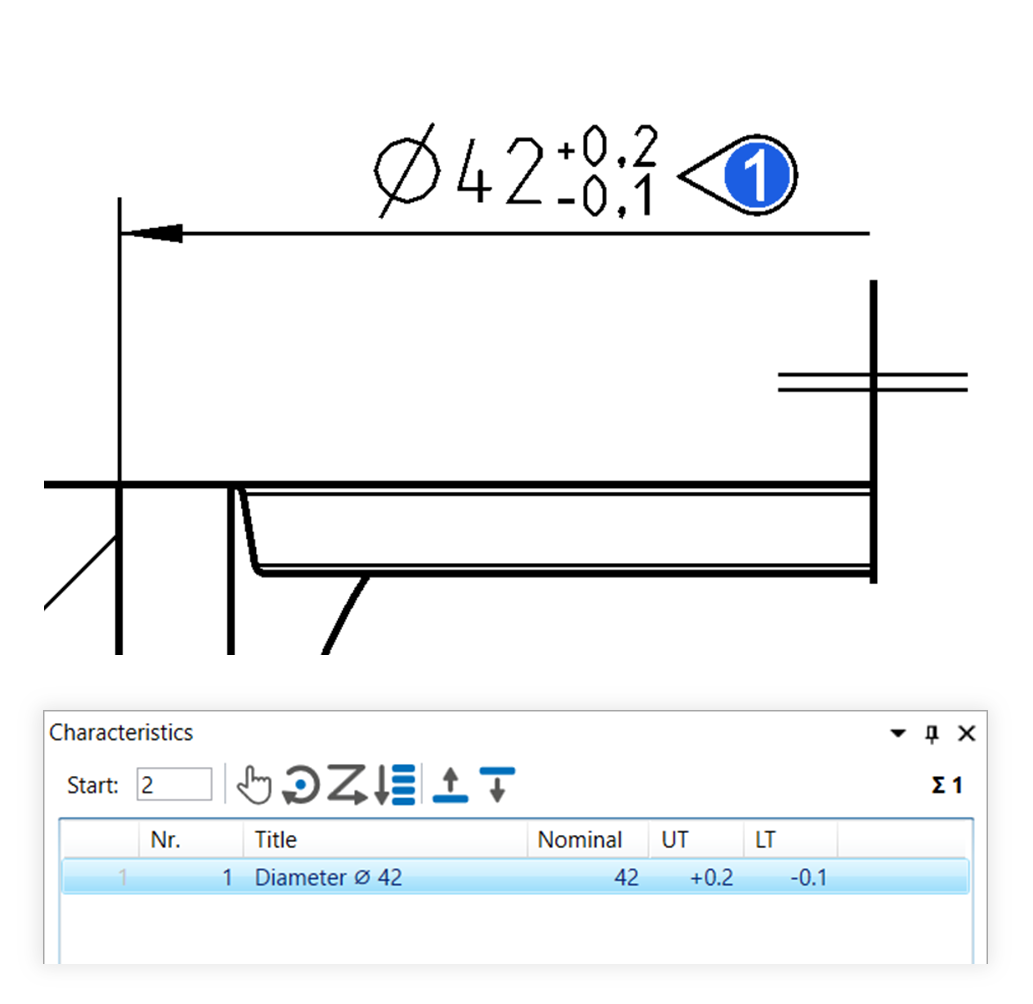 |
||