infra CONVERT
blue DAT • infra DAT
mdm TOOL
infra CONVERT
blue DAT • infra DAT
mdm TOOL
This is an old revision of the document!
| Step | Action | Result | |
|---|---|---|---|
| 2 | Set start value | Enter the desired number in the field for the start value in the Characteristics list function window, which is to be assigned for the next characteristic to be numbered. | The starting value is predetermined, for example “1”: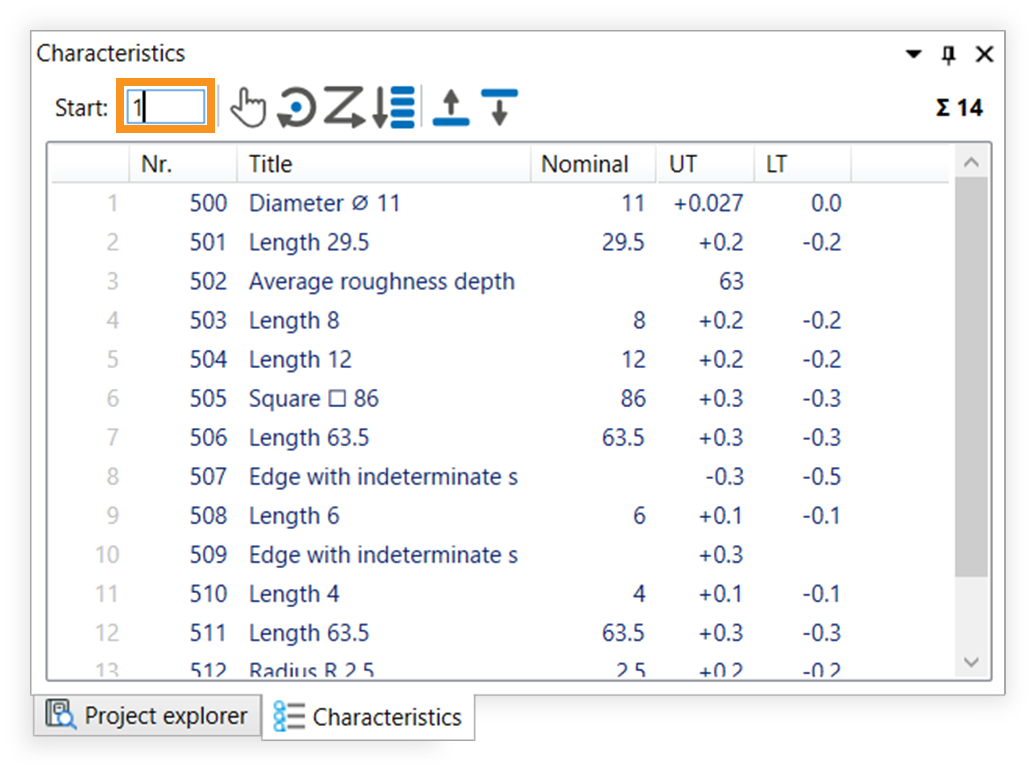 |
| 2 | Numbering | Three alternative functions are available for the numbering: 2a) Manually number 2b) Number clockwise 2c) Number in reading direction |
|
| 2a | Manually number | 1) Click on the Manually number button ( | 1) The Manually number mode is now active. |
2) Move the mouse pointer over the drawing surface and click on the stamp of the desired characteristic.: | 2) The characteristic number has been changed: The next free number is now displayed in the field for the start number. Note If a number has already been assigned, the next free number is automatically selected. |
||
| 3) You can now click on additional characteristics or leave the Manually number mode by clicking on the Selection tool button ( | 3) If necessary, additional characteristics are re-numbered. The Manually number mode is now no longer active. | ||
| 2b | Number clockwise | 1) Select the characteristics to be numbered, either by selection in the characteristics list or on the drawing sheet (see also User interface > Operation – Special features when selecting). | 1) The desired characteristics are selected. The drawing view mentioned in step 1 is to be re-numbered consecutively in the example. |
| 2) Click on the Number clockwise button ( | 2) The Stamp clockwise mode is now active. | ||
3) Move the mouse pointer over the drawing surface (the pointer is now displayed as a positioning cursor 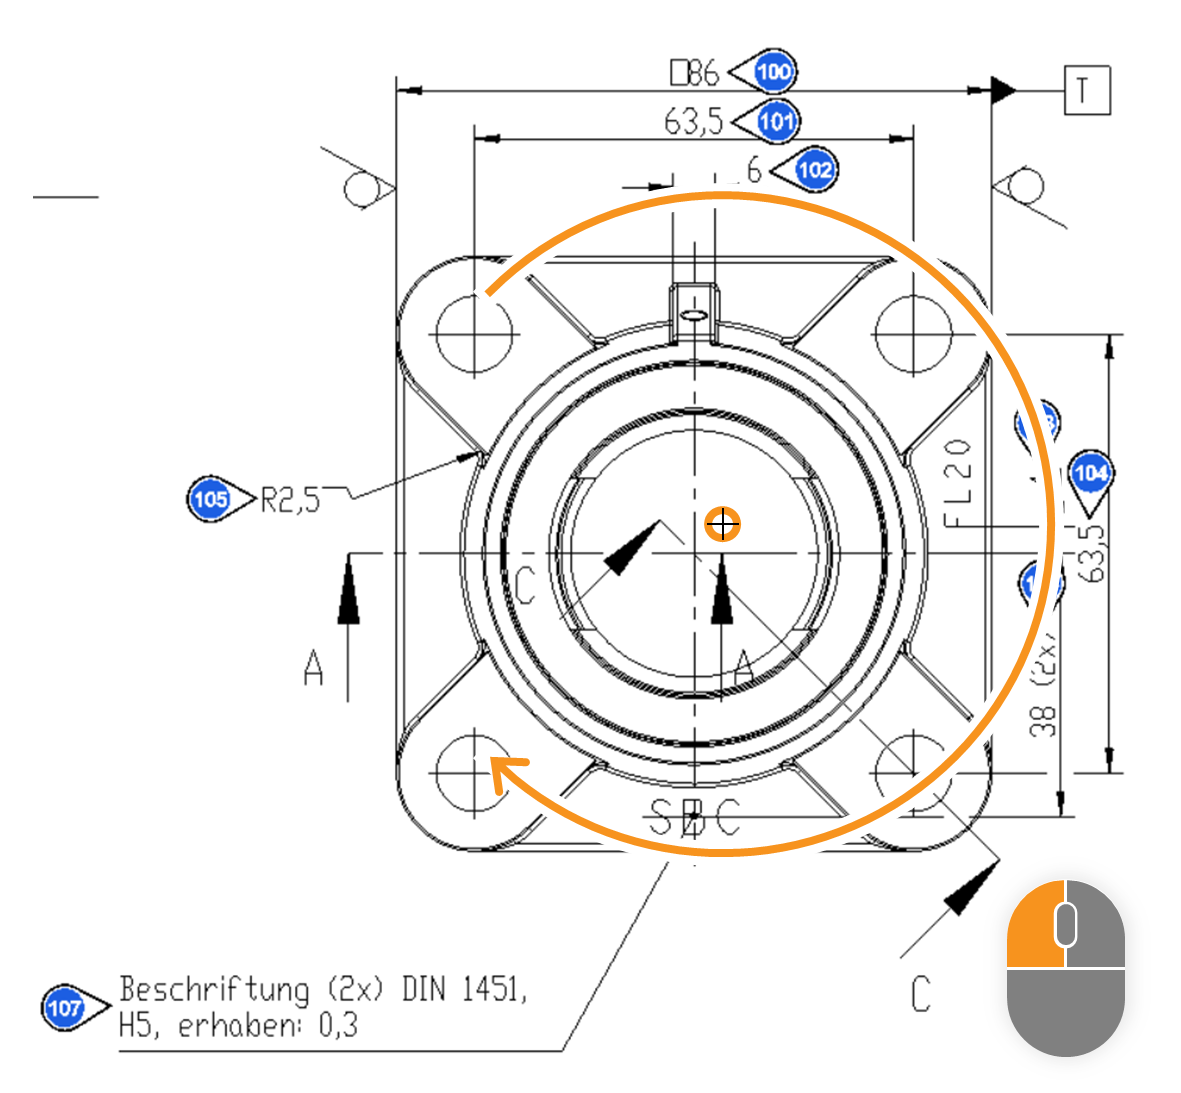 | 3) The characteristic numbers have been re-numbered corresponding to their position relative to the center point: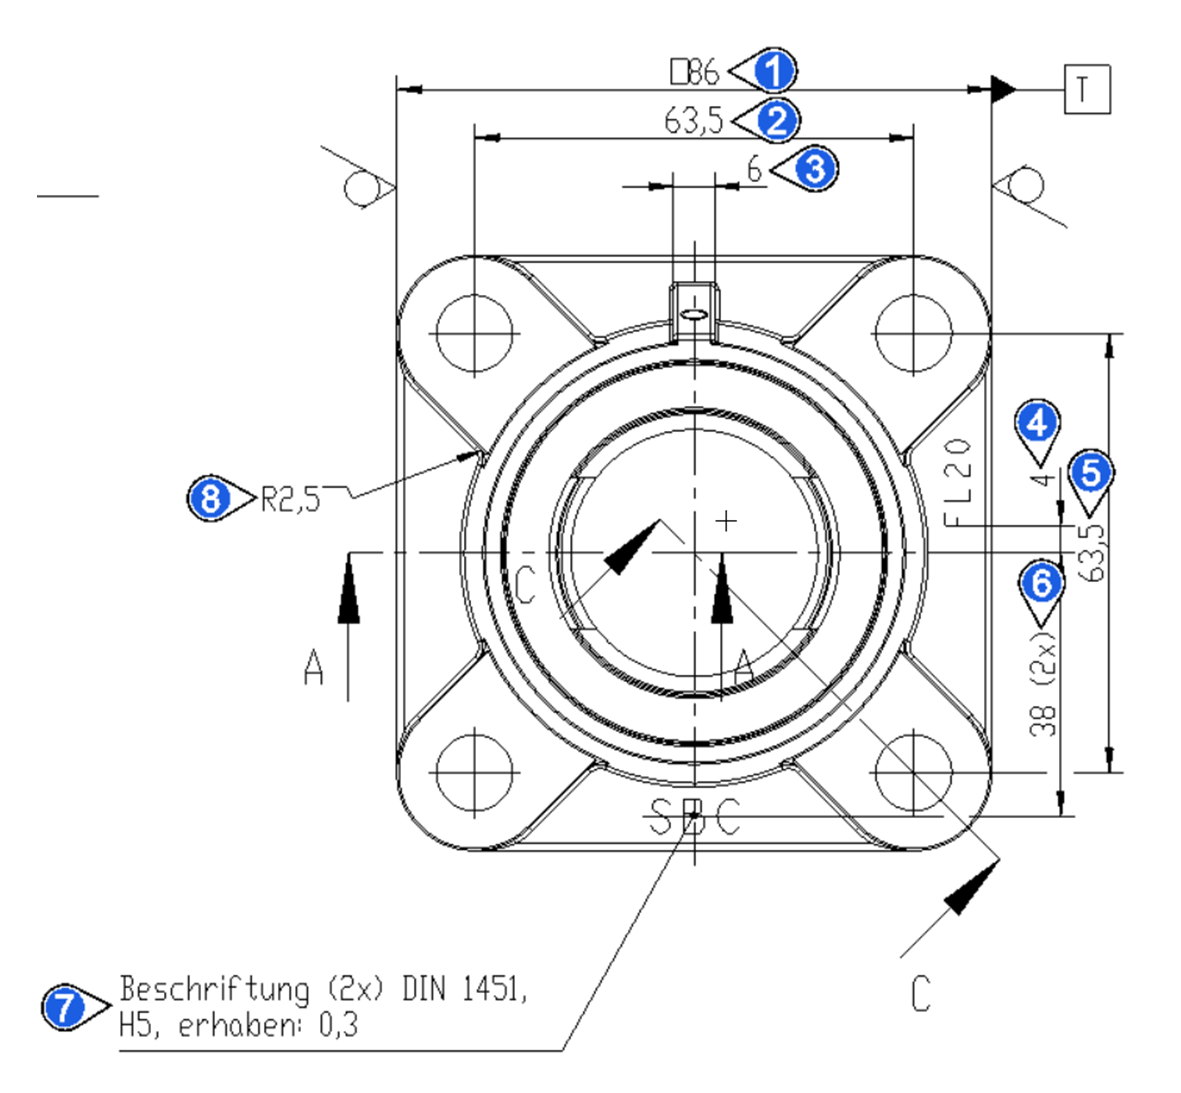 The next free number is displayed in the field for the start number. Note If a number has already been assigned, the next free number is always automatically selected. |
||
| 2c | Number in reading direction | 1) Select the characteristics to be numbered, either by selection in the characteristics list or on the drawing sheet (see also User interface > Operation – Special features when selecting). | 1) The desired characteristics are selected. The drawing view mentioned in step 1 is to be re-numbered consecutively in the example. |
| 2) Click on the Number in reading direction button ( | 2) The characteristics are now numbered in the reading direction (from left to right and top to bottom):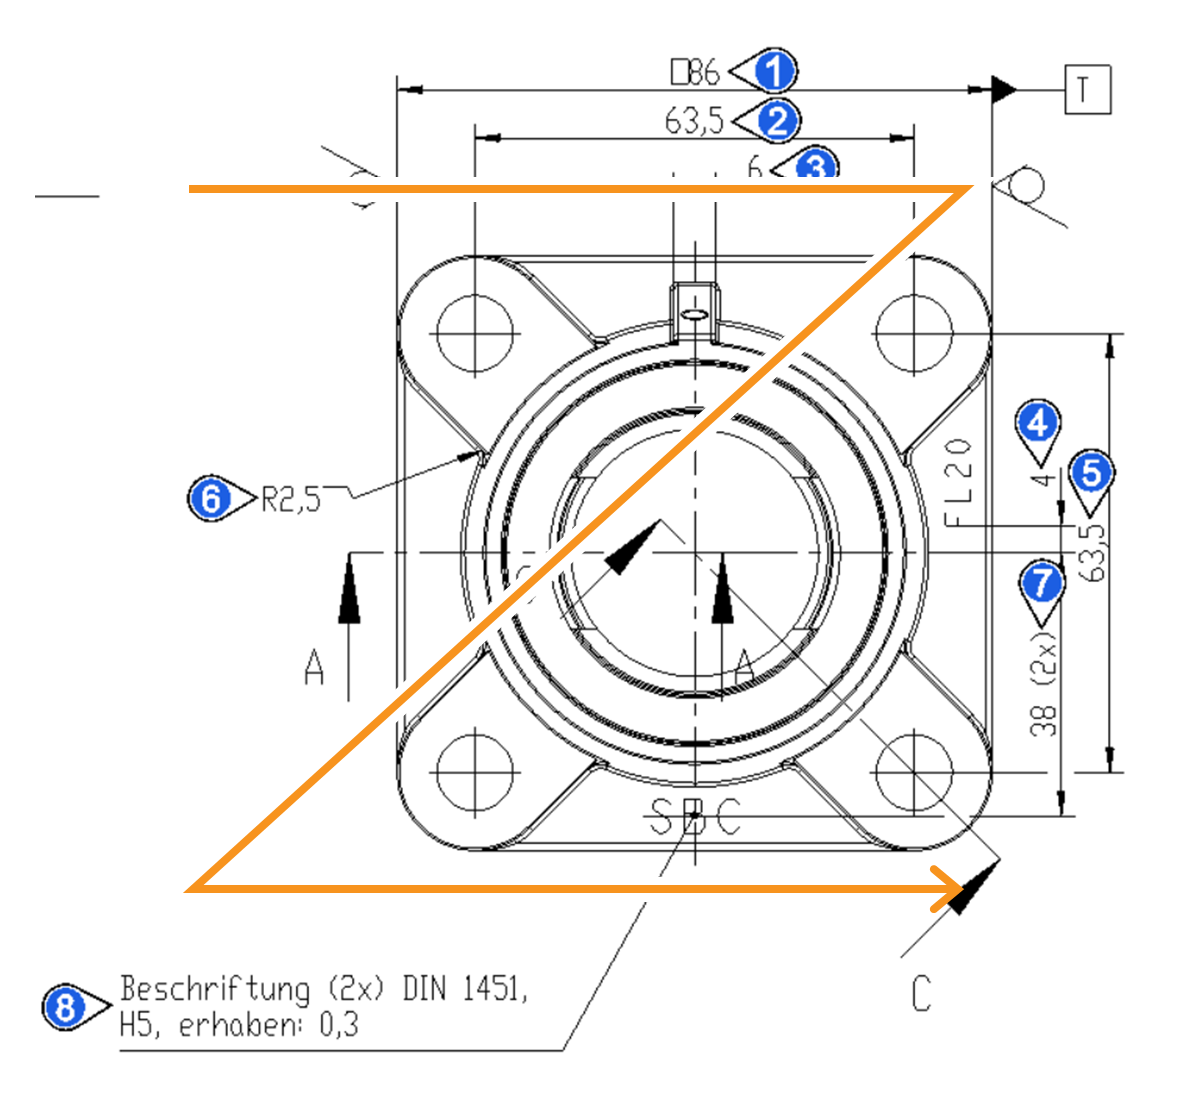 The next free number is displayed in the field for the start number. Note If a number has already been assigned, the next free number is always automatically selected. |
||
| 2d | Renumber by list position | 1) Select the characteristics to be numbered, either by selection in the characteristics list or on the drawing sheet (see also User interface > Operation – Special features when selecting). | 1) The desired characteristics are selected: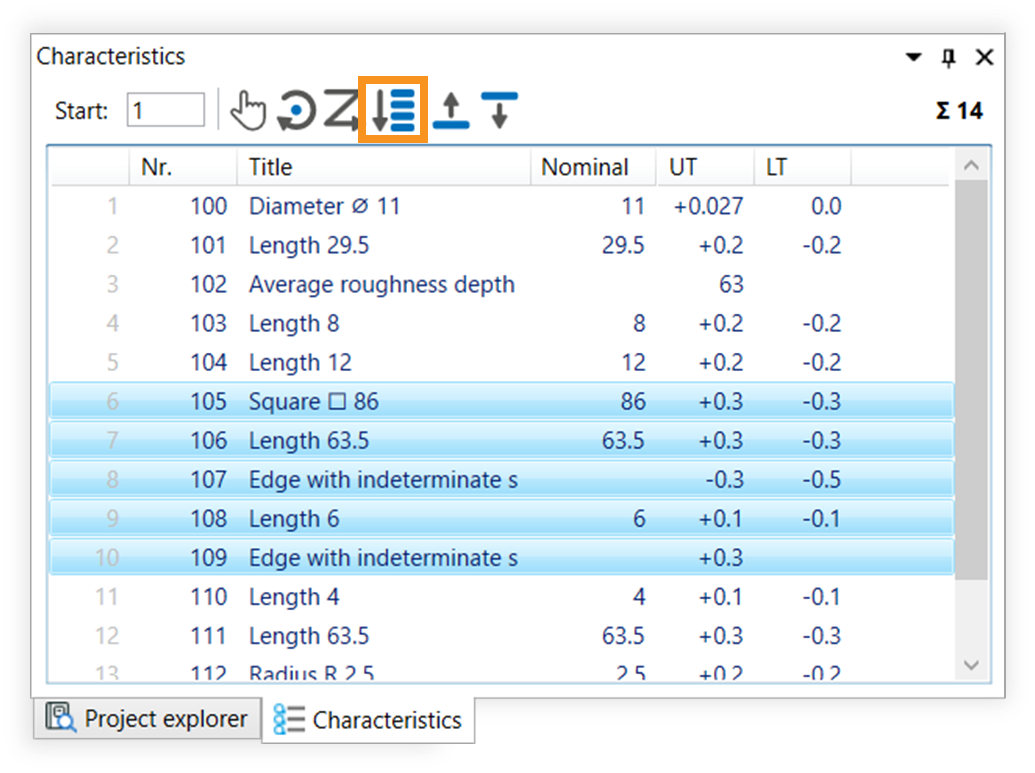 |
| 2) Click on the Renumber by list position button ( | 2) The characteristic numbers have been re-numbered corresponding to their position in the characteristic list: The next free number is displayed in the field for the start number. Note If a number has already been assigned, the next free number is always automatically selected. |
||