infra CONVERT
blue DAT • infra DAT
mdm TOOL
infra CONVERT
blue DAT • infra DAT
mdm TOOL
| Step | Action | Result | |
|---|---|---|---|
| 1 | Select test plan | In the Project overview, right-click on the test plan version you with to export and then place the cursor over the list entry Export as in the context menu that opens. | 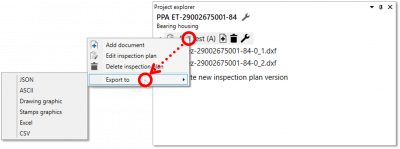 |
| 2 | Export test plan … | The test plan can now be … 2a) …exported in JSON format. 2b) … exported in ASCII transfer format. 2c) … exported in CSV format. 2d) … exported to an Excel file. |
|
| 2a | … in JSON format | In the sub-menu of the context menu, click on Json. | In the file manager window that opens, you can now save the file as usual in a location of your choice |
| 2b | … in ASCII transfer format | 1) In the sub-menu of the context menu, click on ASCII transfer format. | 1) The Export in ASCII transfer format dialogue window will open: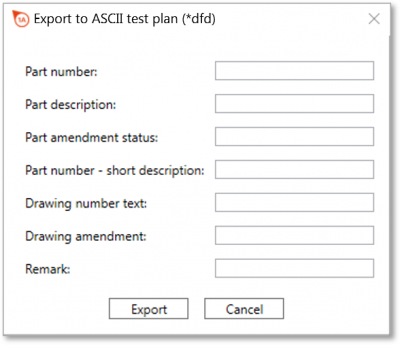 |
| 2) Here, you can enter data for the file header and then click on Export. | 2) In the file manager window that opens, you can now save the file as usual in a location of your choice | ||
| 2c | … in CSV format | In the sub-menu of the context menu, click on CSV. | In the file manager window that opens, you can now save the file as usual in a location of your choice |
| 2d | … to an Excel file | 1) In the sub-menu of the context menu, click on Excel. Note Microsoft Excel must be installed on the computer to execute the export. | 1) The Export to an Excel file dialogue window will open: |
| 2) Here, you can now select the Excel template file and check the Open Excel box if you want Microsoft Excel to open once the export is complete. Then, click Export. | 2) In the file manager window that opens, you can now save the file as usual in a location of your choice | ||