Stamp templates
The properties of the characteristic categories can be edited on the Stamp templates tab of the Project settings menu. Click on
- Apply, at the bottom of the window to save the changes without closing the window,
- on OK, to save the changes and close the window or
- on Cancel, to discard the changes.
The settings are saved with the project.
Note Your CAQ system provider or administrator may be able to prevent you from changing some settings under certain circumstances. Please contact them if an incorrectly set option interrupts your workflow.
When creating new projects, the definitions stored in the configuration file “StampTemplates.json” are loaded, see Administrator Manual > Configuration and Import > Parameter file "StampTemplates". If necessary, contact your system administrator.
Invoke
The menu can be invoked as follows:
Menu bar
Click on Edit and then on Project settings in the drop-down menu that opens. The Project settings menu window opens. Select the Stamp templates tab in the list on the left side of the window.
Create, edit or delete stamp templates
| Funktion | Beschreibung | |
|---|---|---|
| | Scale up all stamps | Gradually increase the stamp radius, minimum distance of the connection line and distance to the text in all stamp templates. The button can also be held down. Note Available from programme version 2.4.1. |
| | Scale down all stamps | Gradually decrease the stamp radius, minimum distance of the connection line and distance to the text in all stamp templates. The button can also be held down. Note Available from programme version 2.4.1. |
| | Create | Add a new stamp template. |
| | Delete | Delete the selected stamp template. Note A stamp template can only be deleted if it is not already assigned to a category. |
Properties
| Property | Description | |
|---|---|---|
| | Name | Unique name. |
| | Description | Individual description. |
| | Color | Color of the stamp symbol. |
| | Radius | Size of the stamp in an absolute, CAD-internal unit. |
| | Shape | Geometry of the stamp symbol (VDA, circle, triangle, square, diamond, hexagon). |
| | Connection line minimum distance | Minimum distance of a stamp to a drawing specification, from which a connecting line is marked (in an absolute, CAD-internal unit). With the value 0 no line is drawn. If there is to be no minimum distance, set the value to 0.1, for example. |
| | Distance to text | Distance (from reference point) at which the stamp is set away from the drawing entry. Note Available from programme version 2.4.1. |
| | Thickness of connection line | Thichness with which the connection line is drawn. With “ 0” a hairline will be drawn. Note Available from programme version 2.4.1. |
| Stamp position | Position where the stamp is placed next to the drawing entry. Note Available from programme version 2.4.1. |
|
Note The settings “Opacity” (opacity of the entire stamp) and “Fill stamp” (filling the inside of the stamp with the colour white) are no longer available from program version 2.4.1. The opacity or transparency of the stamp can be set with the colour selector (property “colour”).
Save/Export
Note Available from programme version 2.4.1.
You can save the currently set project settings (definitions for tolerance tables, tags, categories and stamp templates) as a template for new projects. To do this, click on the Save … button in the bottom right-hand corner.
| Function | Description | |
|---|---|---|
| | Save as … | Export the currently set definitions for tags, categories and stamp templates to a directory of your choice. The configuration files “CharacteristicTags.json”, “SpecialCategories.json” and “StampTemplates.json” are exported. |
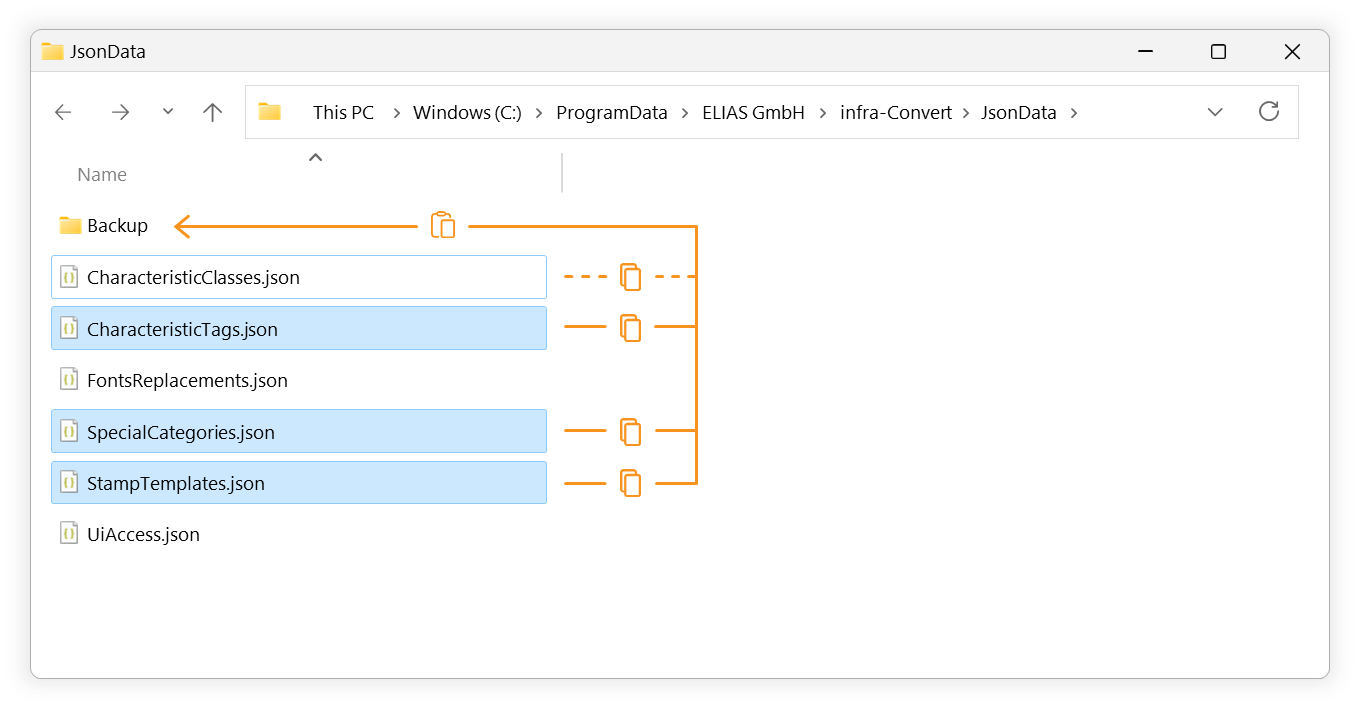
| Set as default (Admin) | Set the currently defined definitions for tolerance tables, tags, categories and stamp templates as default. The definitions for the tolerance tables are written into “Settings.json” in the programme data directory (“ProgramData”). The definitions for tags, categories and stamp templates are written by overwriting the configuration files “CharacteristicTags.json”, “SpecialCategories.json” and “StampTemplates.json” in the program data directory. Note How to start infra CONVERT in administrator mode is described here: “Settings > Settings > Administration > Open”. |
|
When setting as default the project template files in the directory “%ProgramData%/ELIAS GmbH/infra-Convert” are exchanged. During an update they will be overwritten with standard template files and deleted during uninstallation. They should therefore be saved and inserted after an over-installation (update) or new installation.
