Compare drawings (Pro version)
With this function, you can create a new test plan version (“target”) based on an existing test plan version (“source”) within a project. In this way, you can create an adjusted test plan for a new version of a drawing with minimal effort. Only new or edited characteristics must be stamped again.
The test plan versions are interlinked when this function is applied. The changes can be seen clearly and any existing characteristic numbers cannot be assigned to new characteristics.
Workflow
| Step | Action | Result | |
|---|---|---|---|
| 1 | Call function | 1) In the “Project overview”, right-click the target drawing sheet to whose test plan version you want to transfer characteristics.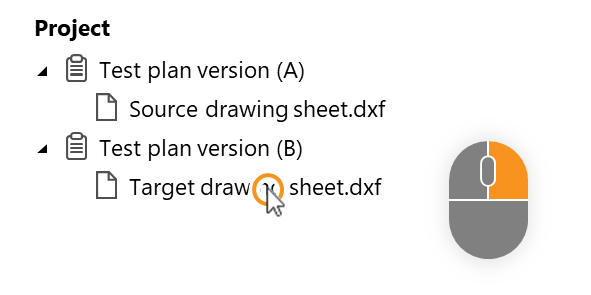 | 1) A selection dialog opens. |
| 2) Under the Compare drawing sheet entry ( Note A source drawing sheet must be assigned to a different test plan version than the version of the target drawing sheet. | 2) The drawing comparison mode is started. The source and target drawing windows are displayed side by side. See User interface > Function windows > Drawing comparison |
||
| [2] | [Optional] Highlight changes | 1) To visually highlight changes, you can use the red-green comparison mode by clicking the Highlight changes button. ( | 1) Added and removed elements are highlighted in the target drawing window. |
| 3 | Transfer characteristics | 1) In the “Drawing comparison” function window, click Transfer characteristics ( | 1) All characteristics that do not meet one of the following criteria are automatically transferred. They are marked in the comparison list with the status “Unchanged”. |
| When is a characteristic automatically transferred? A characteristic is automatically transferred (A) unless one of the following cases applies: B) The drawing entry has changed in its properties. C) The drawing entry no longer exists or has been moved. D) The drawing entry is located in a grouped element. E) The drawing entry is not grouped in the target. F) The characteristic was inserted manually on the source drawing sheet and the setting that manually inserted characteristics should be transferred automatically is not set, see Customization. 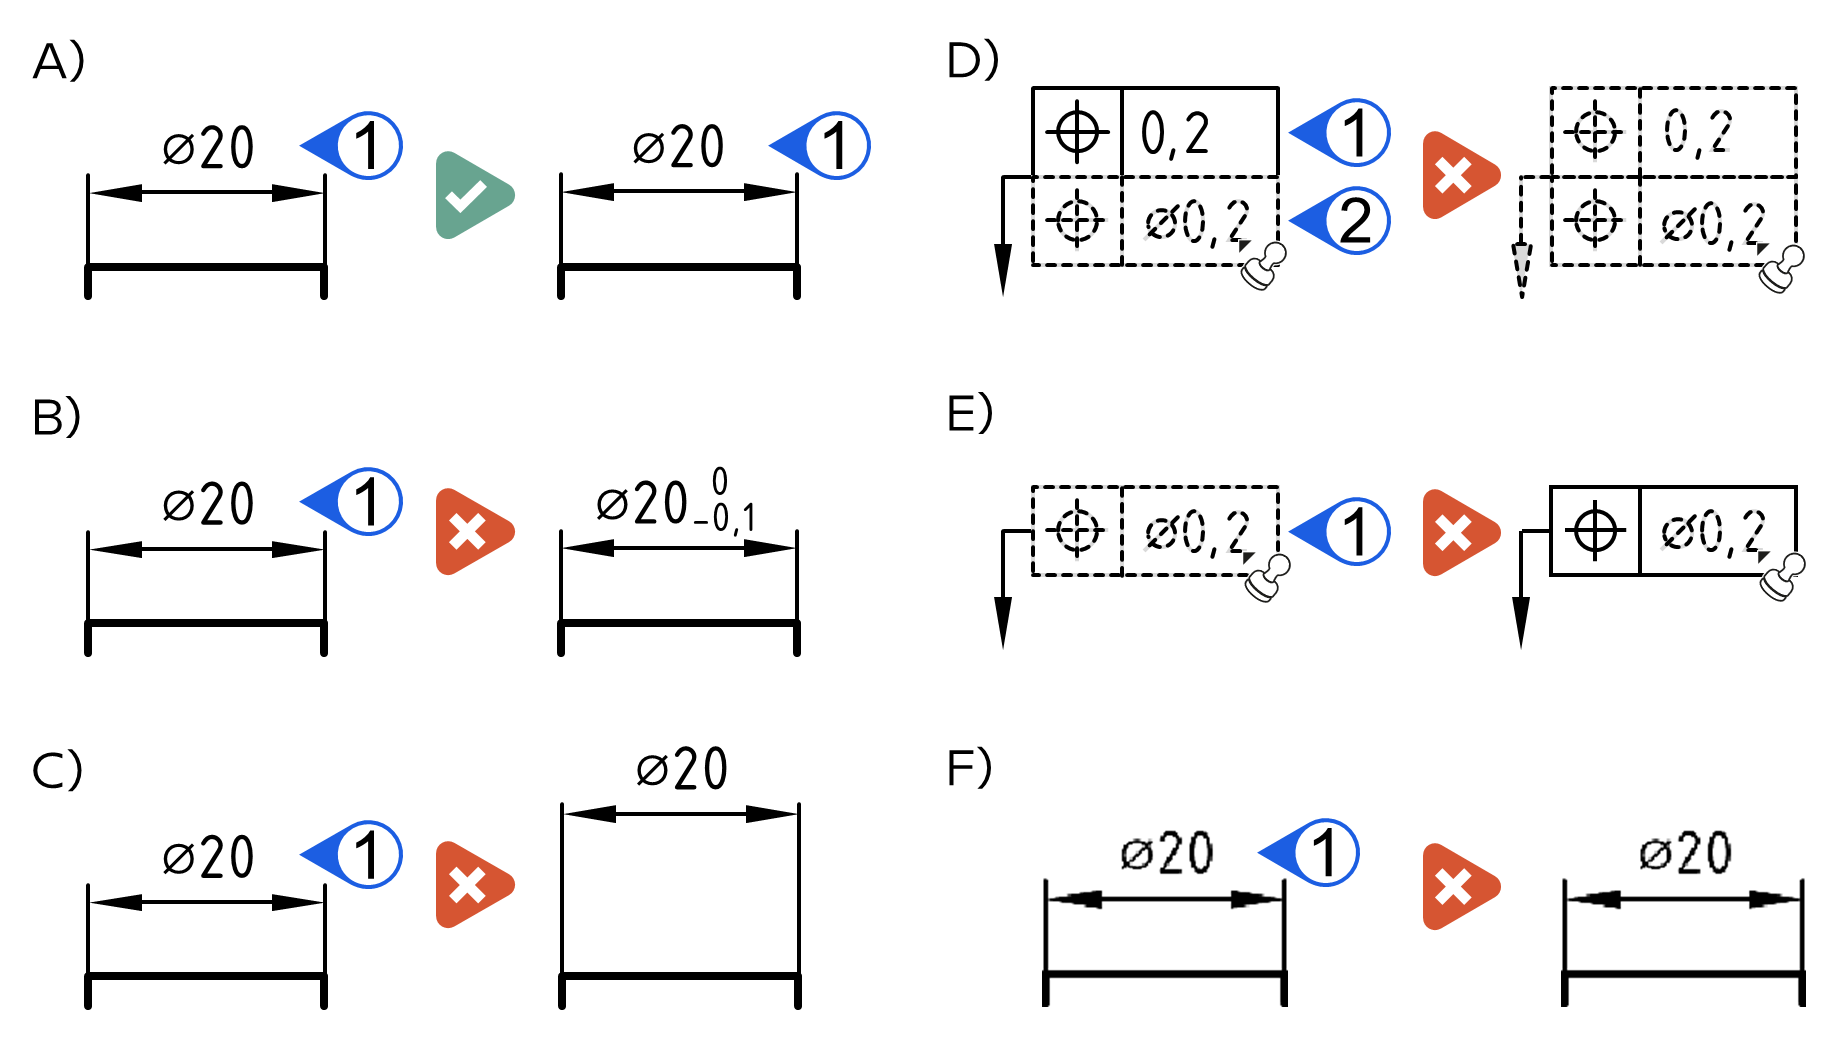 Note You can check whether elements are grouped or separated by activating the Stamp tool ( |
|||
| 2) Go through the comparison list. By double-clicking on an entry, the view jumps to the corresponding position in the source and target drawing sheets. Depending on the case, you can apply the following three steps: 3a) A grouping must first be decomposed (case D) 3b) A view has moved: Use the function Transfer characteristics in view. 3c) The target drawing entry has changed (cases B, C, E, F): Use the Link function |
|||
| 4a | Explode groupings in the target | In case characteristics were not transferred because the target drawing entries are grouped in a block of drawing elements (case D), you can explode the block and then click Transfer Characteristics ( See Functions > Characteristics > Deconstruct text block |
|
| 4b | Transfer characteristics in view | If a drawing view has been moved on the sheet itself or to another sheet, or if you want to transfer only the stamps currently displayed in the source drawing window, you can use the Transfer displayed features function ( See Functions > Drawings > Compare drawing views |
|
| 4c | Link characteristics | 1) In the comparison list, a Link button ( | 1) The mouse pointer shows a stamp icon ( |
2) Stamp the characteristic either as a single characteristic (cases B and C), …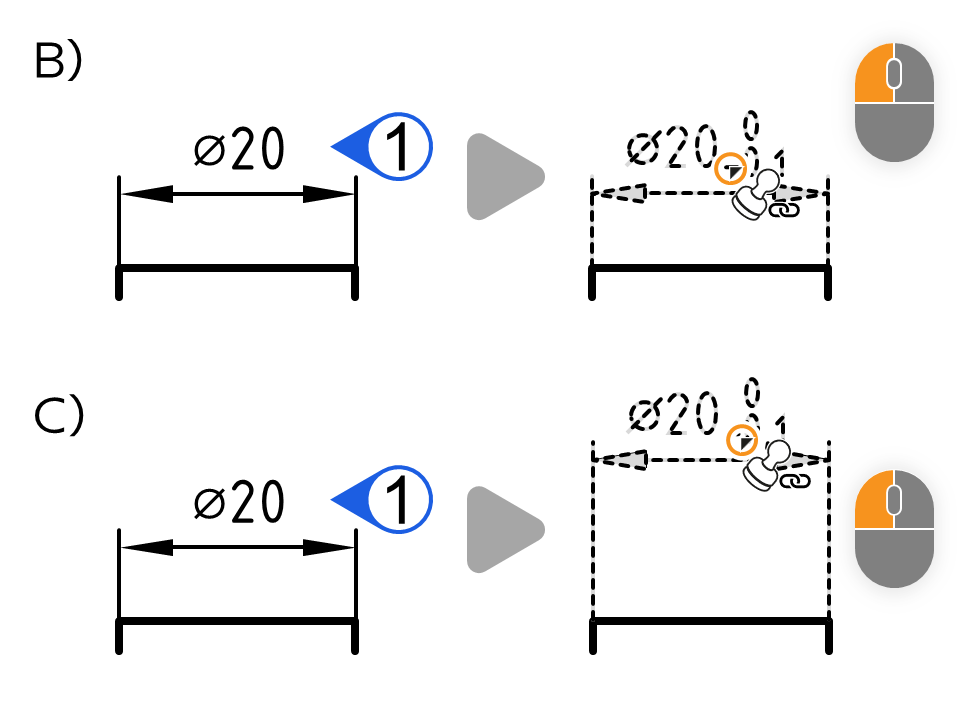 … as a group (case E)¹ or … See Functions > Characteristics > Automatic stamping (grouped) 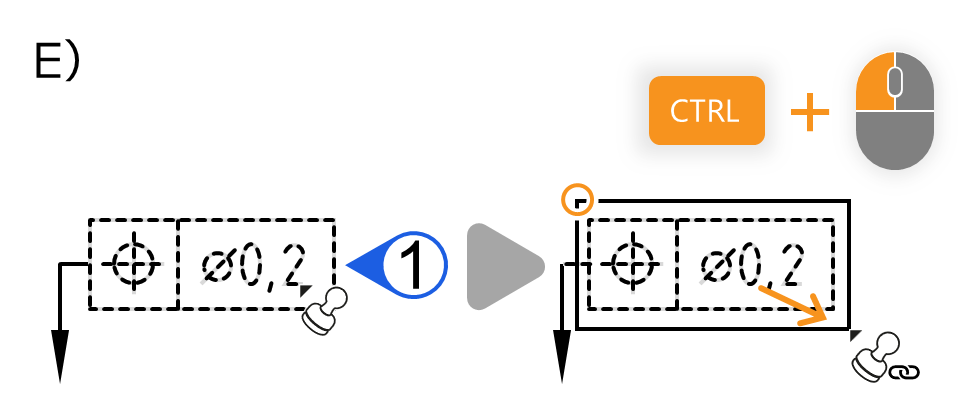 … manually (case F). Siehe Funktionen > Merkmale > Manuell stempeln 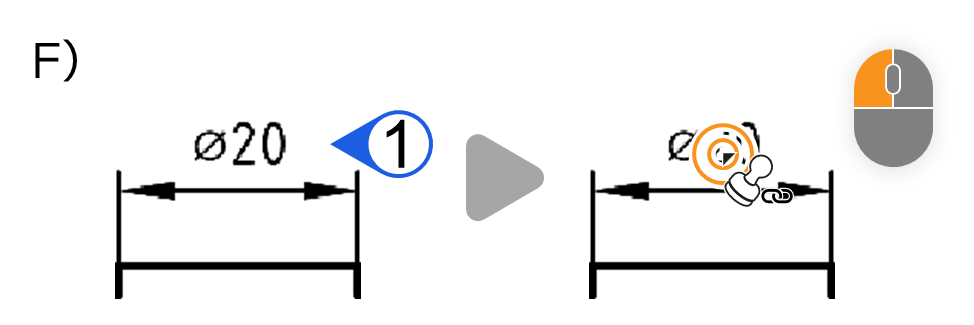 Note¹ The control key (STRG) can only be used from program version 3.1.0. | 2) Quell- und Ziel-Merkmal wurden verknüpft. Das Ziel-Merkmal erhält nach Standardeinstellung dieselbe Stempelnummer, siehe Anpassung. Wenn sich Merkmaleigenschaften unterscheiden, wird dies mit dem Status »Bearbeitet« angezeigt. Die geänderten Eigenschaften sind in der ganz rechten Spalte aufgeführt. | ||
| [5] | [Optional] Vergleichsliste exportieren | The currently displayed comparison list can be exported in XLSX or CSV formats by clicking Export characteristics compare list ( |
|
| [6] | [Optional] Transfer annotations | In the Drawing Comparison function window, click Transfer annotations. ( Note Available from program version 3.5.0. | Annotations were transferred to the same place on the target drawing sheet. |
| [7] | [Optional] Export comparison view | The comparison view with highlighted changes can be exported as an image in PNG format by clicking Export comparison view ( Note Available from program version 4.2.0. |
|
| 8 | End drawing comparison | Close the drawing comparison mode via Exit drawing comparison ( | The drawing window opens with the target drawing sheet. Here you can continue working as usual. |
Customization
This function can be influenced via the following settings:
Numbering
Specify whether the characteristic number should be retained or newly assigned when merging.
See Settings > Settings > Stamps > “Number assignment during drawing comparison” group
Manually inserted characteristics
Specify whether you want manually inserted characteristics to be transferred automatically during transfer.
See Settings > Settings > Stamp > “Transfer of manually inserted characteristics during drawing comparison” group
Highlight changes
Set the display mode of the change highlight mode (red-green comparison).
See Settings > Settings > Comparison > "Highlight Changes (Red-Green Comparison)" group