infra CONVERT
blue DAT • infra DAT
mdm TOOL
infra CONVERT
blue DAT • infra DAT
mdm TOOL
A characteristic can be →stamped by text input with this function. It is required especially if the drawing file cannot be formatted in an interpretable manner (Graphic file, see →Drawing data format). The characteristic is not automatically interpreted from a drawing entry, but from the entered text, in comparison to the Automatic stamping.
The stamp-with-dialogue
The stamp-with dialog allows you to specify basic characteristic properties when stamping. It is displayed at the bottom left of the drawing window when the Stamp tool is activated. In addition to the stamp number with prefix and suffix (1), these are the category and tag (2) as well as the general tolerance tables to be used (4). The set of selected tolerance tables can be added to a quick selection (4). Use the Reset button (![]() ) to restore the default values.
) to restore the default values.
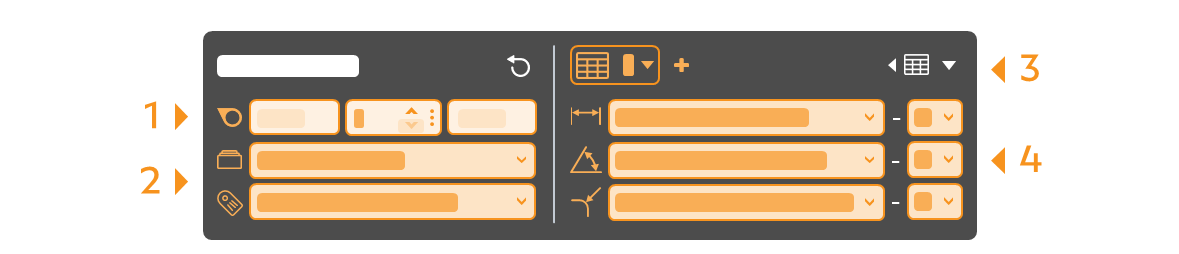
Note The preselection of tolerance table and stamp number via the Stamp with dialog is available from program version 4.4.0.
| Step | Action | Result | |
|---|---|---|---|
| 1 | Open drawing sheet | Open the drawing sheet that you would like to stamp. | The drawing sheet is displayed in the drawing window. |
| 2 | Activate stamp tool | Click on the Stamp tool button ( | If you now move the mouse pointer into the drawing window, it will be displayed as a stamp (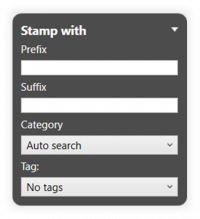 |
| 3 | Check/set start value for the numbering | 1) Set the start value in the Stamp-with dialog or in the Characteristic overview window. You can use the three-dot button in the Stamp number field to set the start value or the next free number via a context menu. | 1) The starting value is fixed. |
| 2) Define further properties in the Stamp with dialog: • Prefix and suffix as a supplement for the stamp text • Category • Tag • Tolerance table and class for generally tolerated dimensions | 2) The properties are fully selected. | ||
| 4 | Define characteristic position | Move the mouse pointer (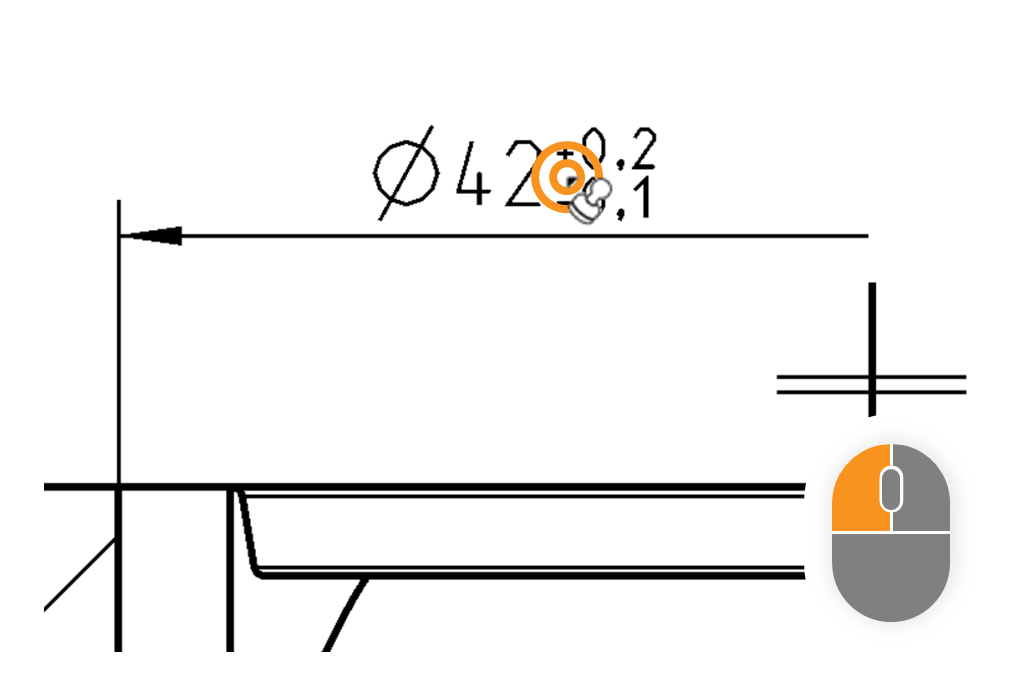 | The “Create new characteristic” quick entry dialog opens: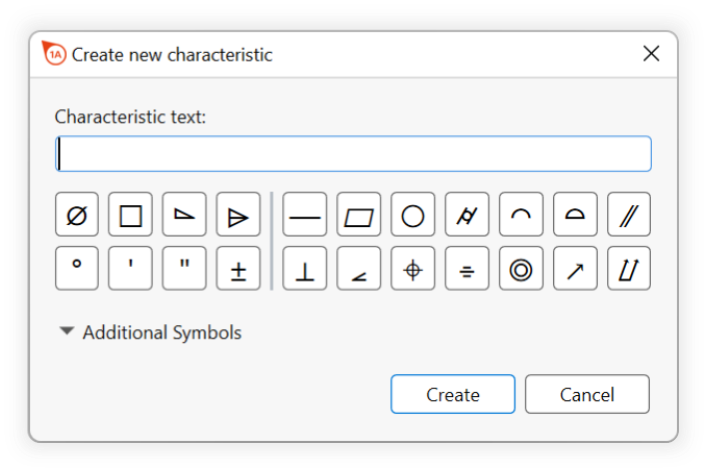 Note The figure shows the quick entry dialog as of program version 3.1.0. |
| [Alternatively] Quick stamping | As an alternative to steps 4 to 6, you can create a characteristic without characteristic text if, for example, you only want to mark an item with a stamp or if you do not want to define the characteristic properties until later. | ||
1) Move the mouse pointer to the characteristic position, press the Shift key on the keyboard, hold it down and double-click with the left mouse button. (Tip: You can also use the Caps Lock key if you want to create several characteristics.)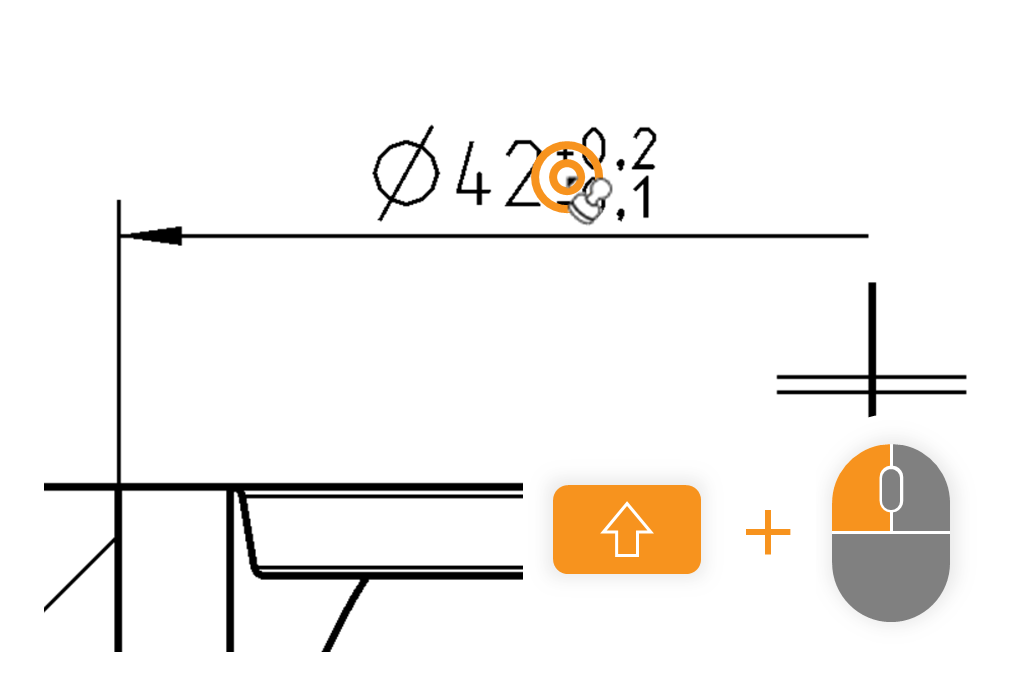 | 1) An attributive characteristic of the class “Word specification” is created. | ||
| 2) The stamp is not yet anchored, but still coupled to the mouse pointer. Move the mouse pointer over the drawing surface in such a way, that the stamp is positioned and oriented as required. Then use the left mouse button to click just the once. | 2) The stamp is now linked to the drawing. | ||
| 5 | Enter characteristic text | Enter the relevant characters of the characteristic in the “Characteristic text” field using the keyboard. You can insert graphic symbols at the cursor position using the buttons below. | By way of example, a characteristic of the specification elements “⌀42”, an upper deviation of “0.2” and a lower deviation of “-0.1” is applied. Click on the ⌀ button and enter the text “42 +0,2 -0,1”: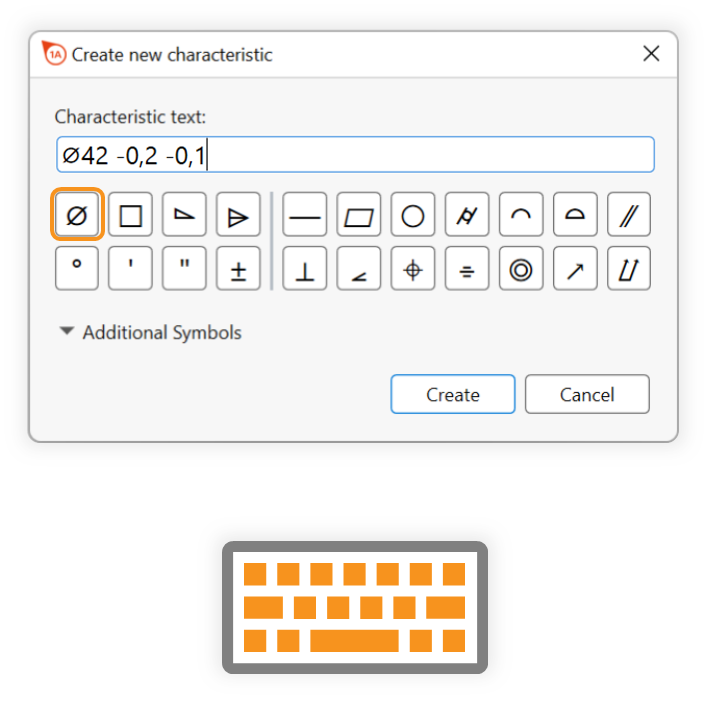 |
| [Alternatively] Create characteristic without text | Alternatively, you can create a characteristic without characteristic text if, for example, you only want to mark an item with a stamp or if you want to define the characteristic properties later. | ||
| Leave the input field empty and click directly on Create or press the Enter key on the keyboard. | An attributive characteristic of the class “Word specification” is created. | ||
| 6 | Create characteristic and position stamp | 1) Click on Create or press the Enter key on the keyboard. | 1) The characteristic is created, but the stamp is not yet positioned. |
2) Move the stamp to the desired position and click the left mouse button to confirm the position.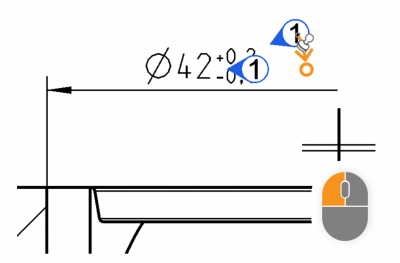 | 2) The stamp is now anchored on the drawing sheet.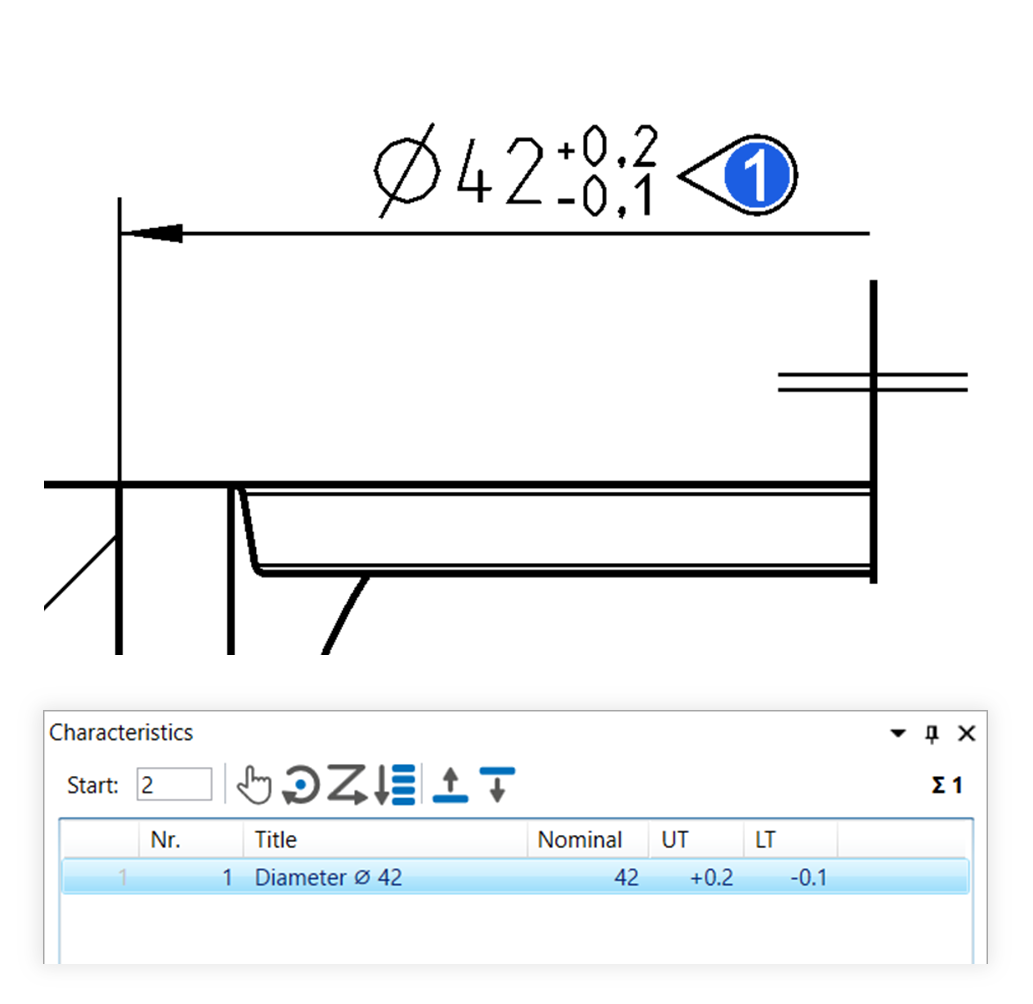 |
||
The function can be influenced via the following settings:
Creating characteristics
Change settings for creating characteristics.
See Settings > Settings > Characteristics
General tolerance tables
Change the underlying general tolerance tables, from which tolerance values for non-individually tolerated measurements are applied.
See Settings > Project settings > Tolerance tables
Stamp settings
Change underlying settings for stamp.
See Settings > Settings > Stamp
Stamp templates
Change the graphical display of the stamp.
See Settings > Project settings > Stamp templates