infra CONVERT
blue DAT • infra DAT
mdm TOOL
infra CONVERT
blue DAT • infra DAT
mdm TOOL
This is an old revision of the document!
| Step | Action | Result | |
|---|---|---|---|
| 1 | Check whether number(s) are already assigned | A number can only be assigned to a characteristic that hasn't yet already been assigned, possibly in combination with prefix and suffix. If you wish to number characteristics in an area, e.g. in a drawing view, on a drawing sheet or the entire drawing, continuously and without any jumps, you have to first ensure that the desired numbers haven't already been assigned. If you are unsure in this respect, we recommend first re-numbering all characteristics of the drawing sheet or the whole drawing consecutively from a start value, which is safely outside the subsequent numbering range. This ensures an efficient procedure (carry out this re-numbering sequence in accordance with the steps described below). You can then readily re-number each area consecutively one after the other. | The number(s) to be newly assigned are not yet assigned already. A drawing view is to be re-numbered consecutively in our example. All characteristics of the drawing were initially re-numbered consecutively starting with the number 500 for this purpose. (Number in reading direction, see the steps described below):  |
| 2 | Set start value | Enter the desired number in the field for the start value in the Characteristics list function window, which is to be assigned for the next characteristic to be numbered. | In the example, we wish to number the drawing view mentioned above consecutively, beginning with the start value 1: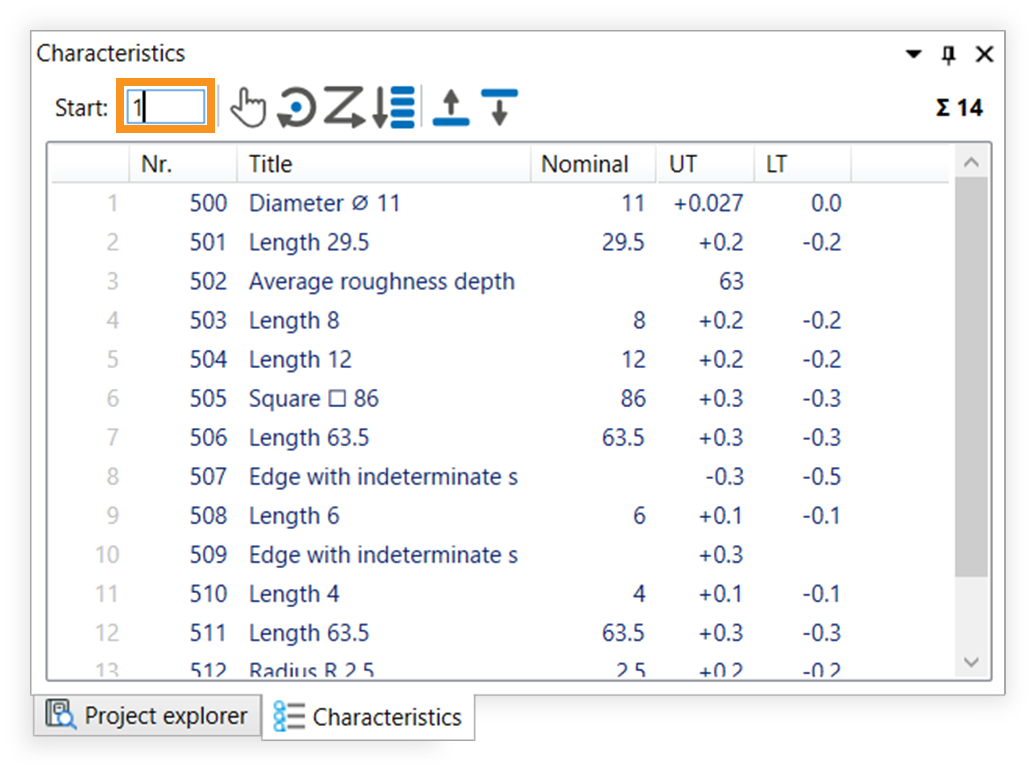 |
| 3 | Numbering | Three alternative functions are available for the numbering: 3a) Manually number 3b) Number clockwise 3c) Number in reading direction |
|
| 3a | Manually number | 1) Click on the Manually number button in the Characteristics overview function window  | 1) The Manually stamp mode is now active. |
| 2) Move the mouse pointer over the drawing surface and click on the stamp of the desired characteristic. | 2) The characteristic number has been changed in the stamp and in the characteristics list. The next free number is now displayed in the field for the start number: Note If a number has already been assigned, the next free number is automatically selected. |
||
| 3) You can now click on additional characteristics or leave the Manually number mode by clicking on the Selection tool | 3) If necessary, additional characteristics are re-numbered. The Manually number mode is now no longer active. | ||
| 3b | Number clockwise | 1) Select the characteristics to be numbered, either by selection in the characteristics list or on the drawing sheet (see also User interface > Operation – Special features when selecting). | 1) The desired characteristics are selected. The drawing view mentioned in step 1 is to be re-numbered consecutively in the example. |
2) Click on the Number clockwise button in the Characteristics overview function window 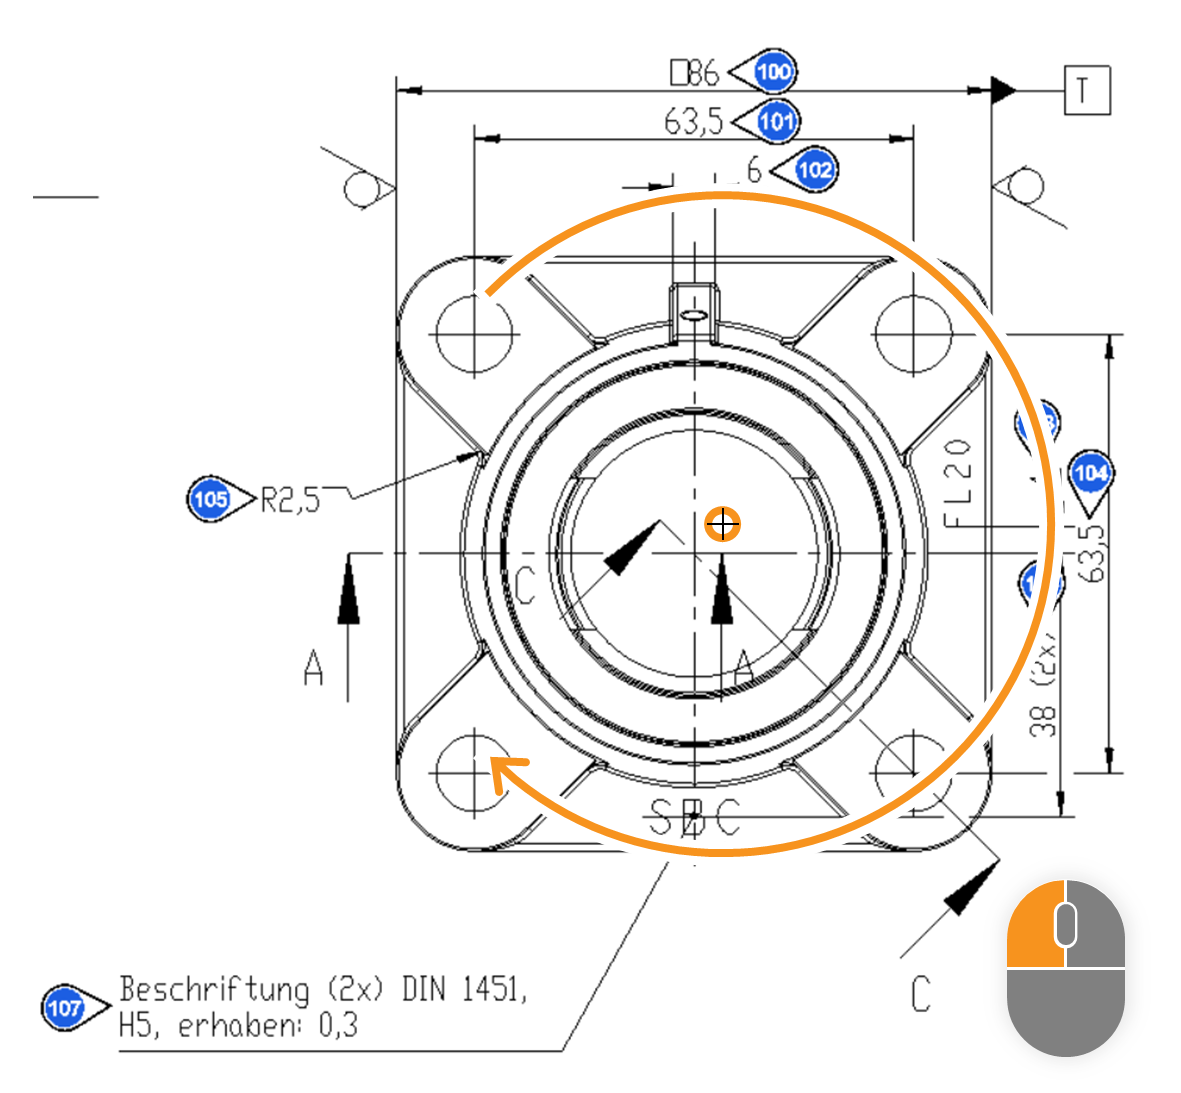 | 2) The Stamp clockwise mode is now active. | ||
| 3) Move the mouse pointer over the drawing surface (the pointer is now displayed as a positioning cursor | 3) The characteristic numbers have been re-numbered corresponding to their position relative to the center point. The next free number is now displayed in the field for the start number: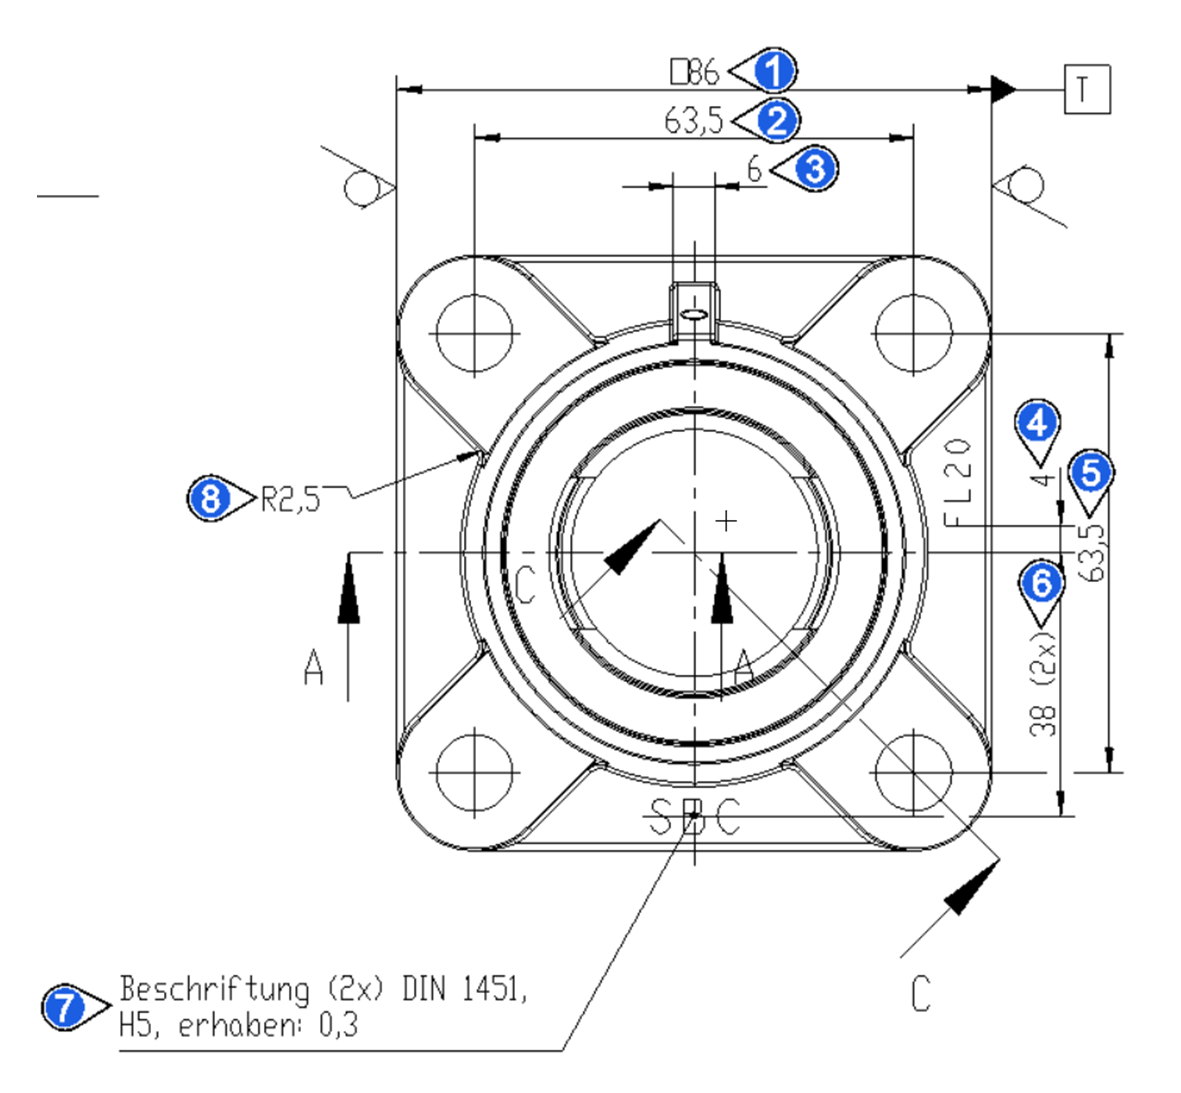 Note If a number has already been assigned, the next free number is always automatically selected. |
||
| 3c | Number in reading direction | 1) Select the characteristics to be numbered, either by selection in the characteristics list or on the drawing sheet (see also User interface > Operation – Special features when selecting). | 1) The desired characteristics are selected. The drawing view mentioned in step 1 is to be re-numbered consecutively in the example. |
2) Click on the Number in reading direction button in the Characteristics overview function window 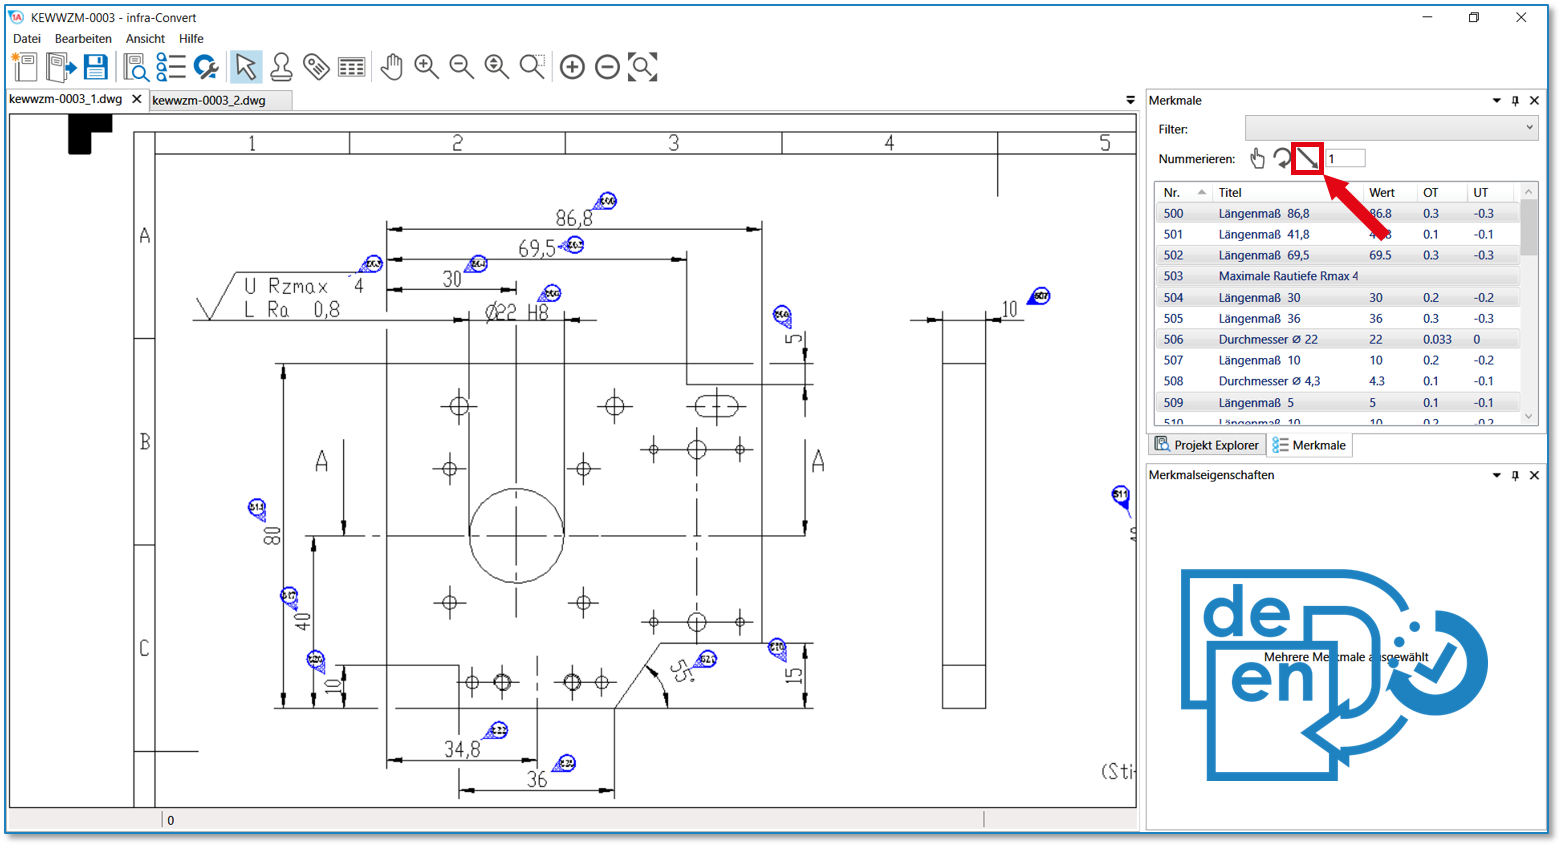 | 2) The characteristics are now numbered in the reading direction (from left to right and top to bottom). The next free number is displayed in the field for the start number: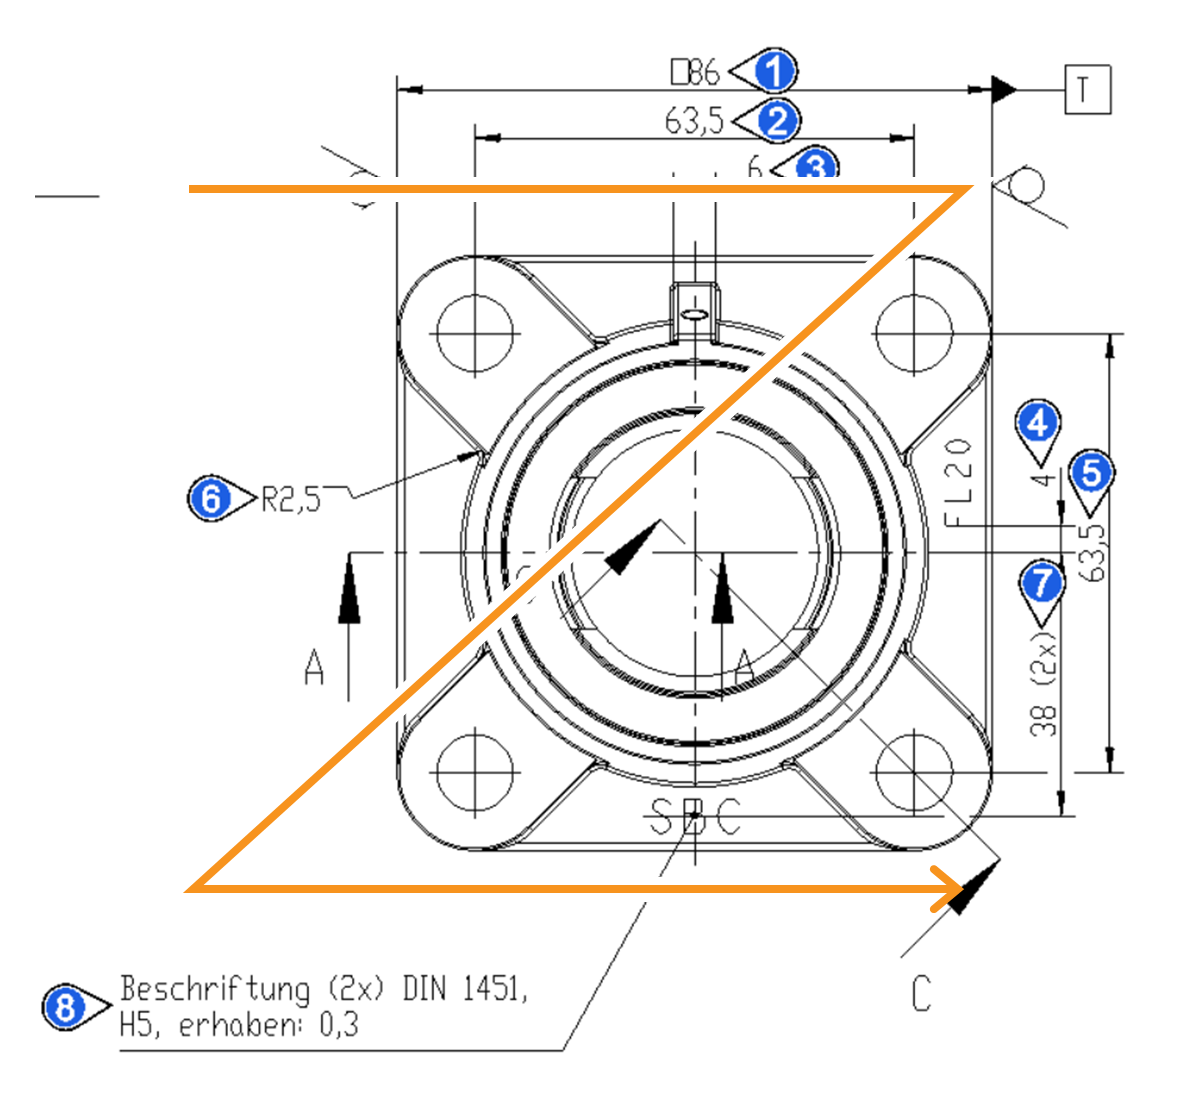 |
||