infra CONVERT
blue DAT • infra DAT
mdm TOOL
infra CONVERT
blue DAT • infra DAT
mdm TOOL
| Step | Action | Result | |
|---|---|---|---|
| 1 | Invoke function | Right-click on the target drawing sheet, into the test plan of which you want to transfer test characteristics, in the Project overview function window. Click on Compare document in the context menu that opens 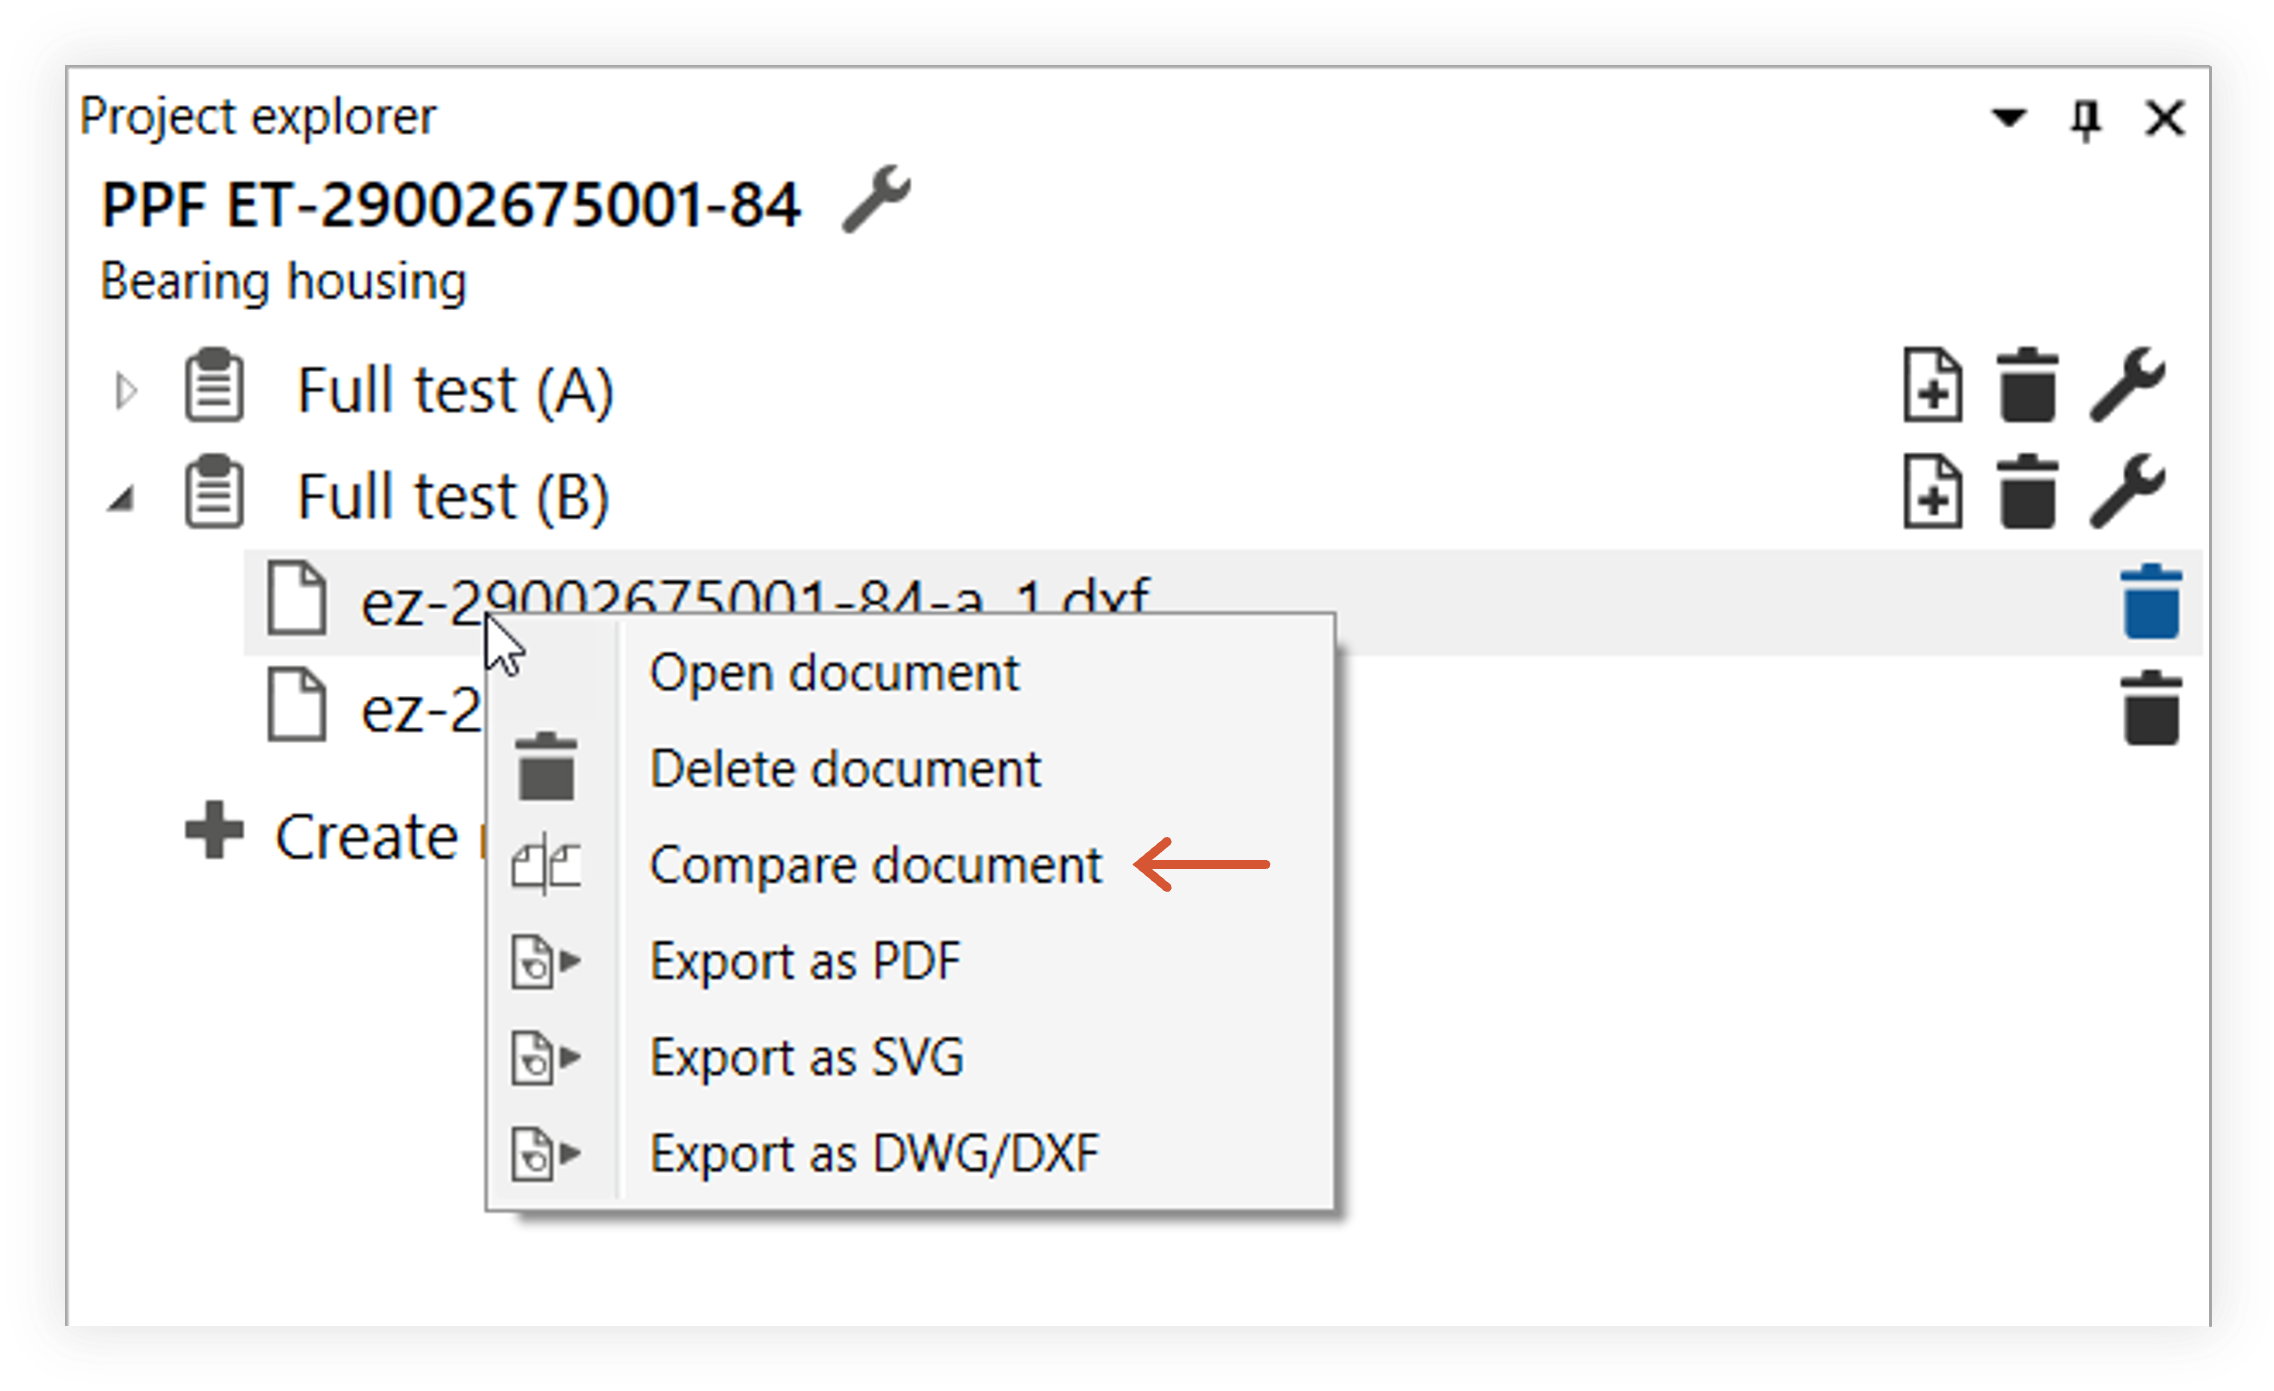 The test characteristics from sheet 1 in test plan version A are to be generated from the characteristics of test plan version 0 in the example. | The Compare documents dialog window opens. The source drawing sheets are displayed whereby a comparison is possible: 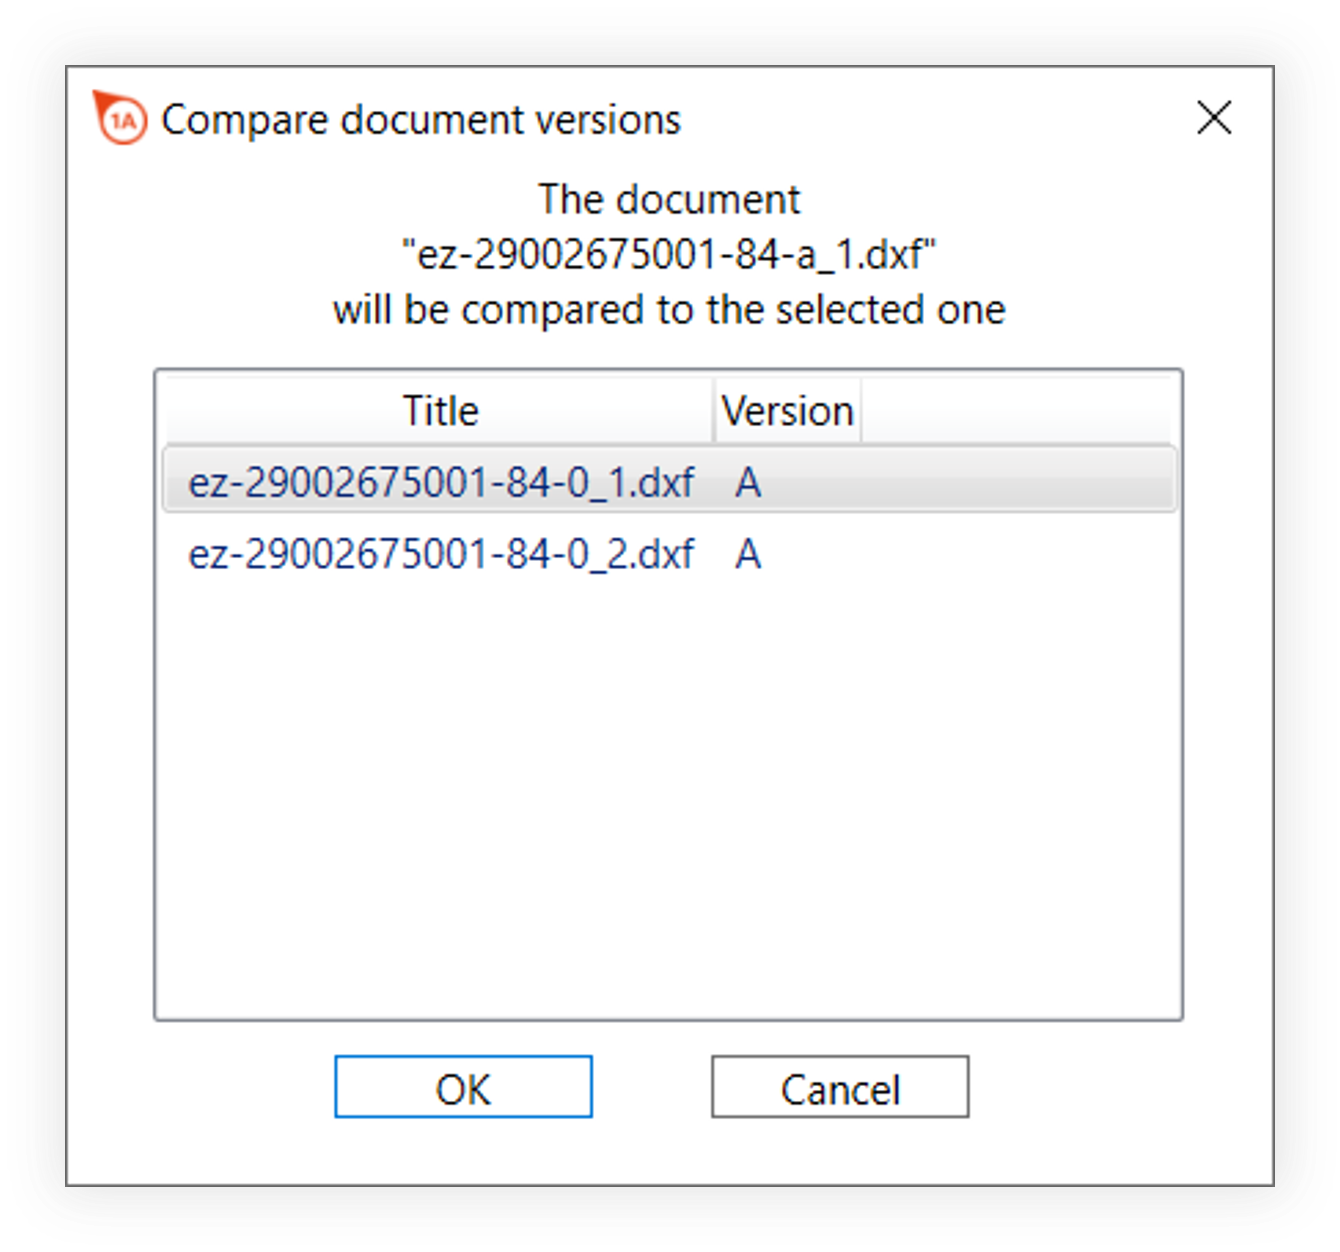 Note Source drawing sheets have to be assigned to test plan versions other than the version of the target drawing sheet. |
| 2 | Select source | Select the corresponding drawing sheet and click on OK. | The working area will be transformed. As described under User interface > Function window > Drawing comparison, the Compare drawing function window is displayed at the bottom left as well as the source and target drawing window placed directly above: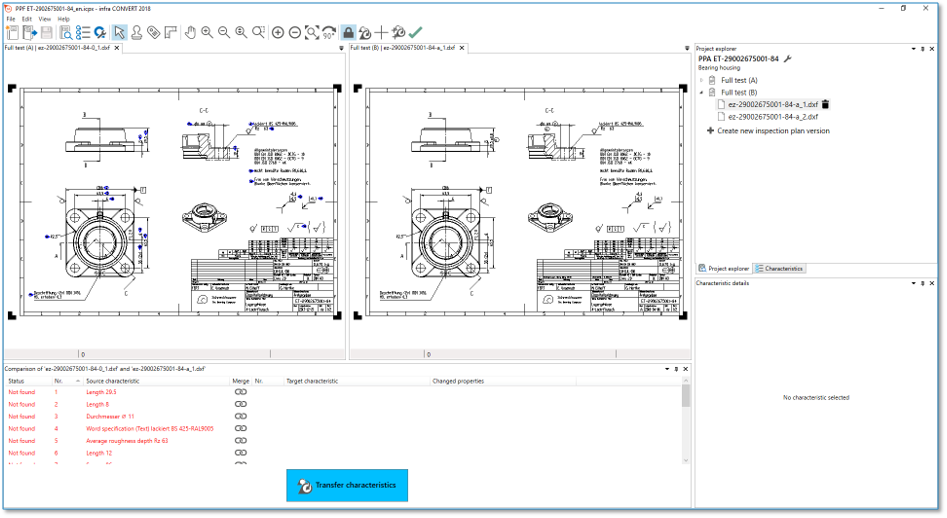 |
| 3 | Apply characteristics | Click on the large blue Apply characteristics button in the Drawing comparison function window to automatically compare all characteristics. Note The Apply characteristics button | All target characteristics now entered were recognized as unchanged, see Status column. Characteristics that have their value changed, are no longer present or have to be stamped as a group must be marked with the status Not found: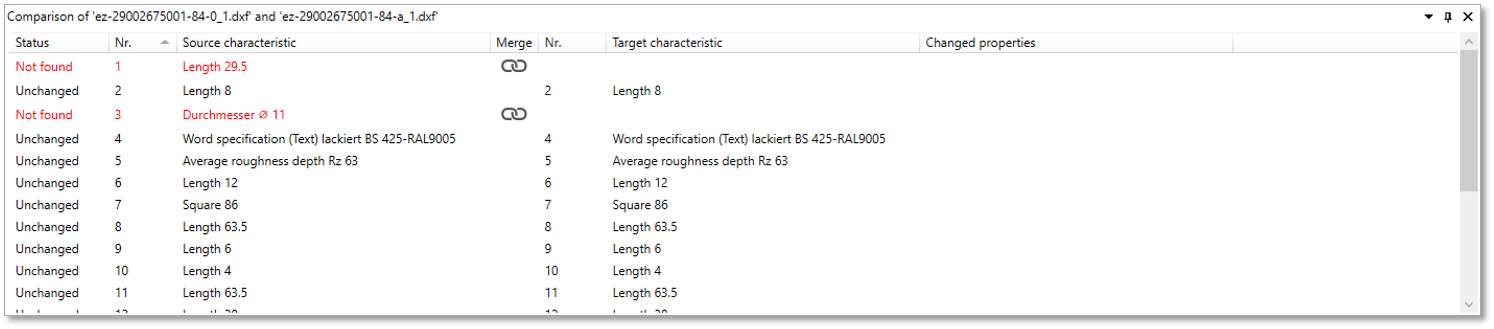 |
| 4 | Merge changed characteristics | 1) Go through the characteristic list. Characteristics whose value has changed or which have to be stamped as a group can now be merged manually. To do so, click on the Merge button in the respective line In the example, characteristic No. 4, the fitting specification of which has changed from H8 to H7, is to be applied into the new test plan version by merging: 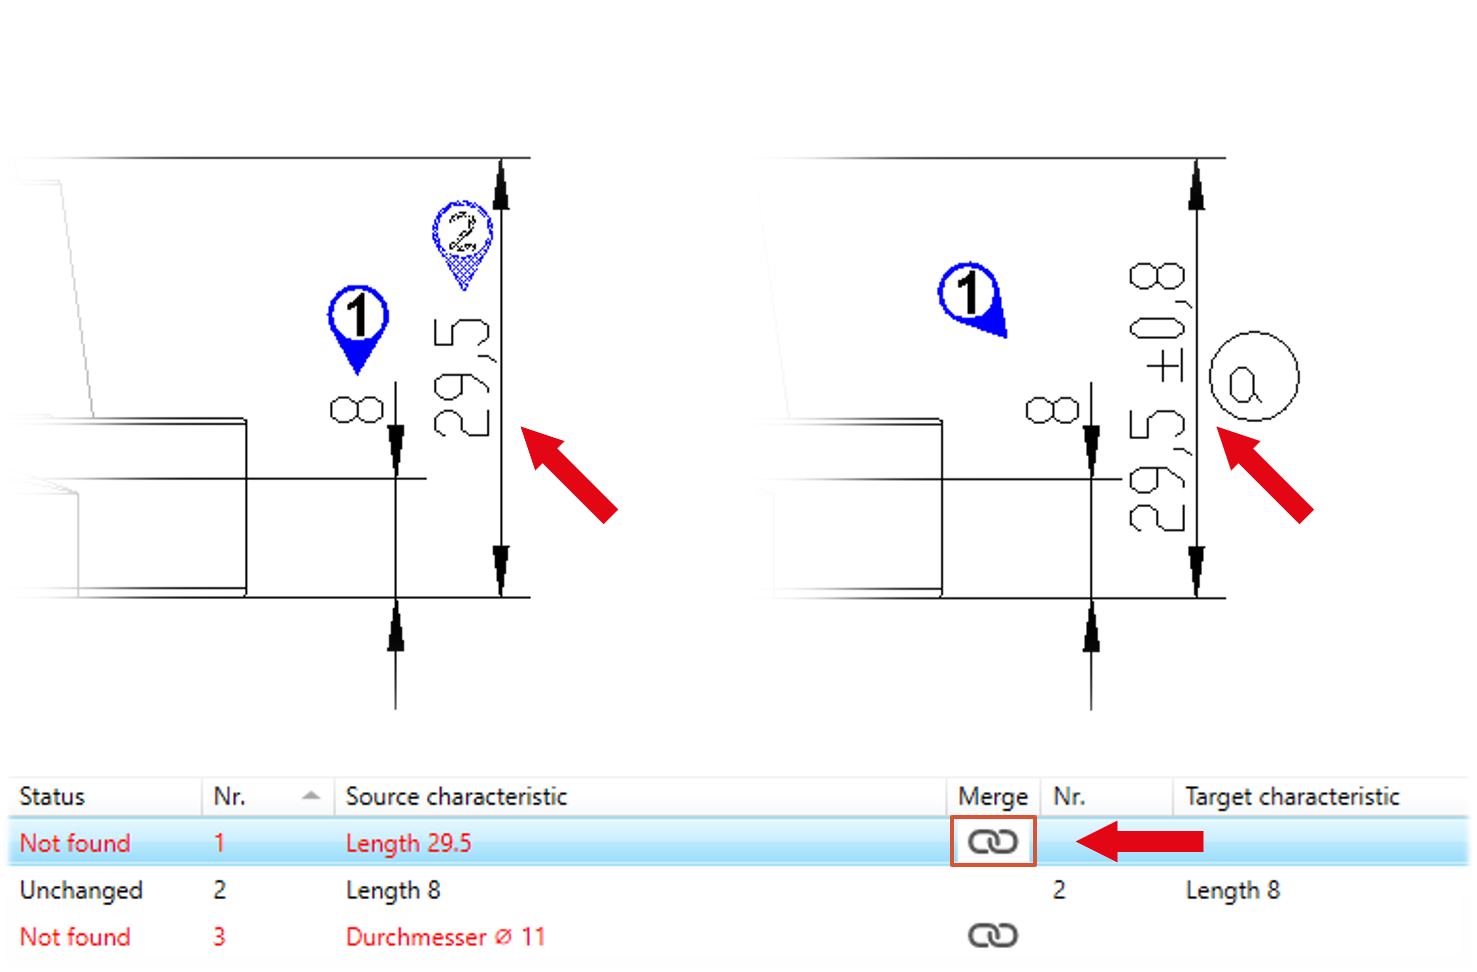 | 1) The stamp function is active. The mouse pointer changes to the stamp icon 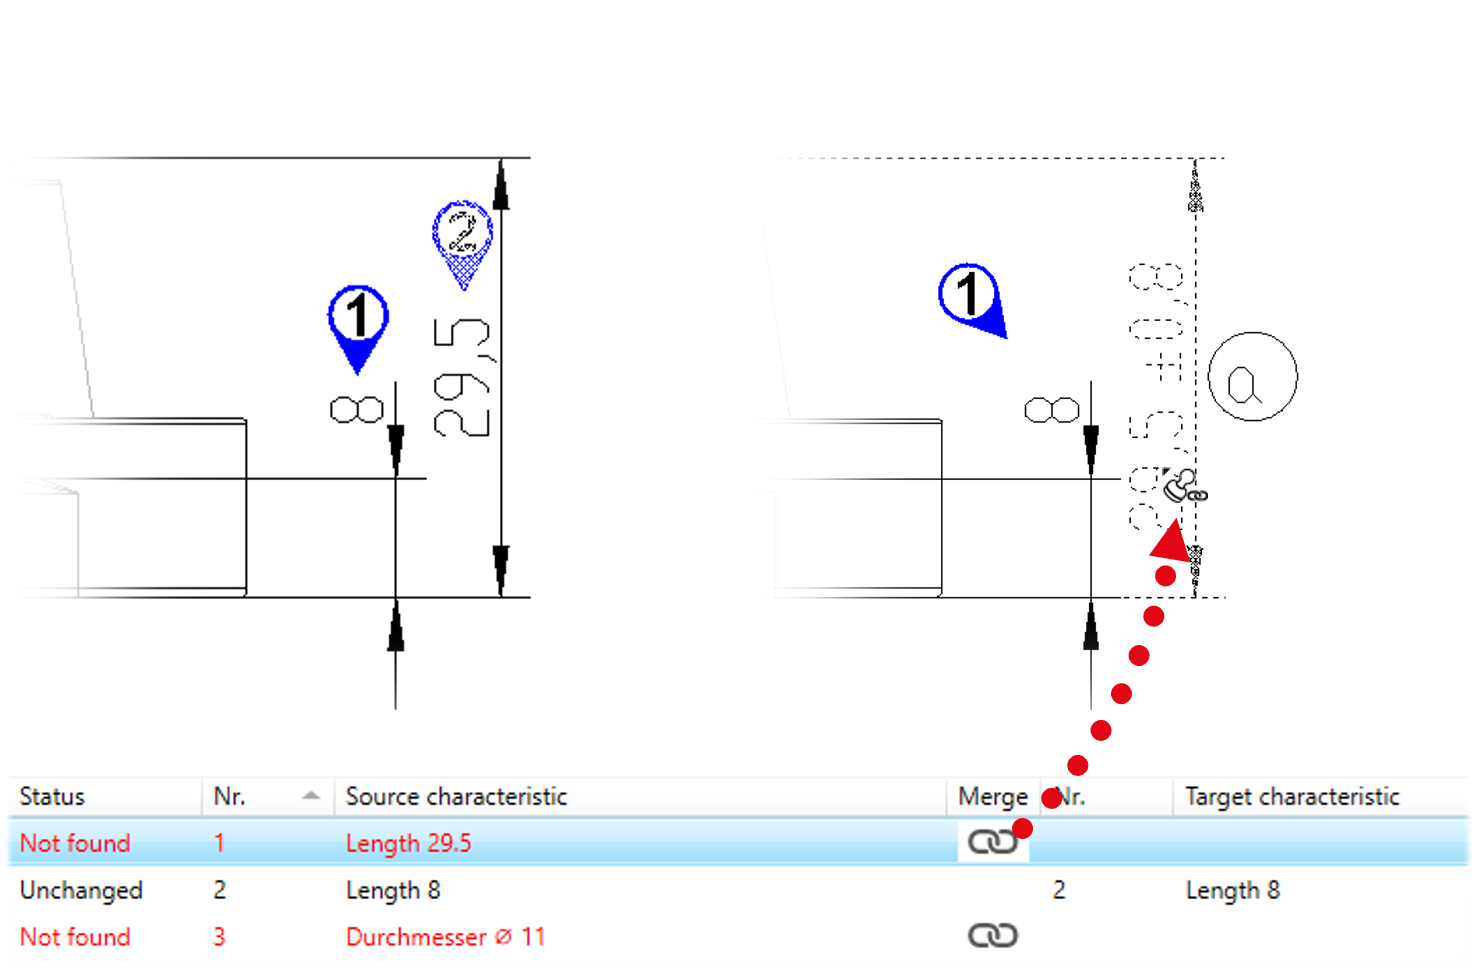 |
| 2) Stamp the characteristic either as a single characteristic or as a group (see also Functions > Characteristics > Automatically stamp). | 2a) If different characteristic properties are in existence, the Characteristics dialog window opens differently: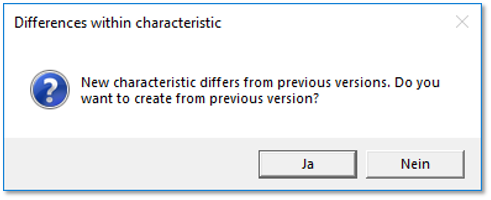 2b) This prompt does not appear if there are no differences. Instead, the characteristic is applied directly as a target characteristic and marked as unchanged. You can disregard step 3 in this case. |
||
| 3a) Click on Yes to create a new characteristic. | 3a) A new characteristic has been created. The differences to the comparison characteristic are retained in the Changed properties column in the characteristic list: |
||
| 3b) Click on No to keep the characteristic number. | 3b) A characteristic has been created with the same characteristic number. The differences to the comparison characteristic are retained in the Changed properties column in the characteristic list: |
||
| 5 | Close function window | Close the function via Note You can go back at any point to view the comparisons made and to edit further. To do so, invoke the function as described under step 1. | The drawing window opens with the target drawing sheet. You can continue working as usual here. |