infra CONVERT
blue DAT • infra DAT
mdm TOOL
infra CONVERT
blue DAT • infra DAT
mdm TOOL
This is an old revision of the document!
A characteristic or several characteristics can be automatically →stamped with this function. It is necessary that the drawing file is available in the drawing format DWG, DXF or IGES or in PDF format with font embedding, see →Drawing data format.
If a drawing entry is not contiguous, i.e. if the individual elements are separated, the entry can be stamped as a group.
See Functions > Characteristics > Stamp Automatically (Grouped)
Note PDF files can only be stamped automatically with a Professional license (infra CONVERT Pro), see At a Glance.
| Step | Action | Result | |
|---|---|---|---|
| 1 | Open drawing sheet | Open the drawing sheet that you would like to stamp. | The drawing sheet is displayed in the drawing window. |
| 2 | Activate stamp tool | Click on the Stamp tool button ( | If you now move the mouse pointer into the drawing window, it will be displayed as a stamp (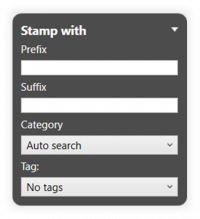 |
| 3 | Check/set start value for the numbering | 1) Set the start value in the Stamp-with dialog or in the Characteristic overview window. You can use the three-dot button in the Stamp number field to set the start value or the next free number via a context menu. | 1) The starting value is fixed. |
| 2) Define further properties in the Stamp with dialog: • Prefix and suffix as a supplement for the stamp text • Category • Tag • Tolerance table and class for generally tolerated dimensions | 2) The properties are fully selected. | ||
| 4 | Stamp | There are three alternative sub-functions available for the actual stamping: 4a) Stamp a characteristic individually. 4b) Automatically recognize and stamp all characteristics in one area. |
|
| 4a | Stamp individual characteristic | Move the mouse pointer (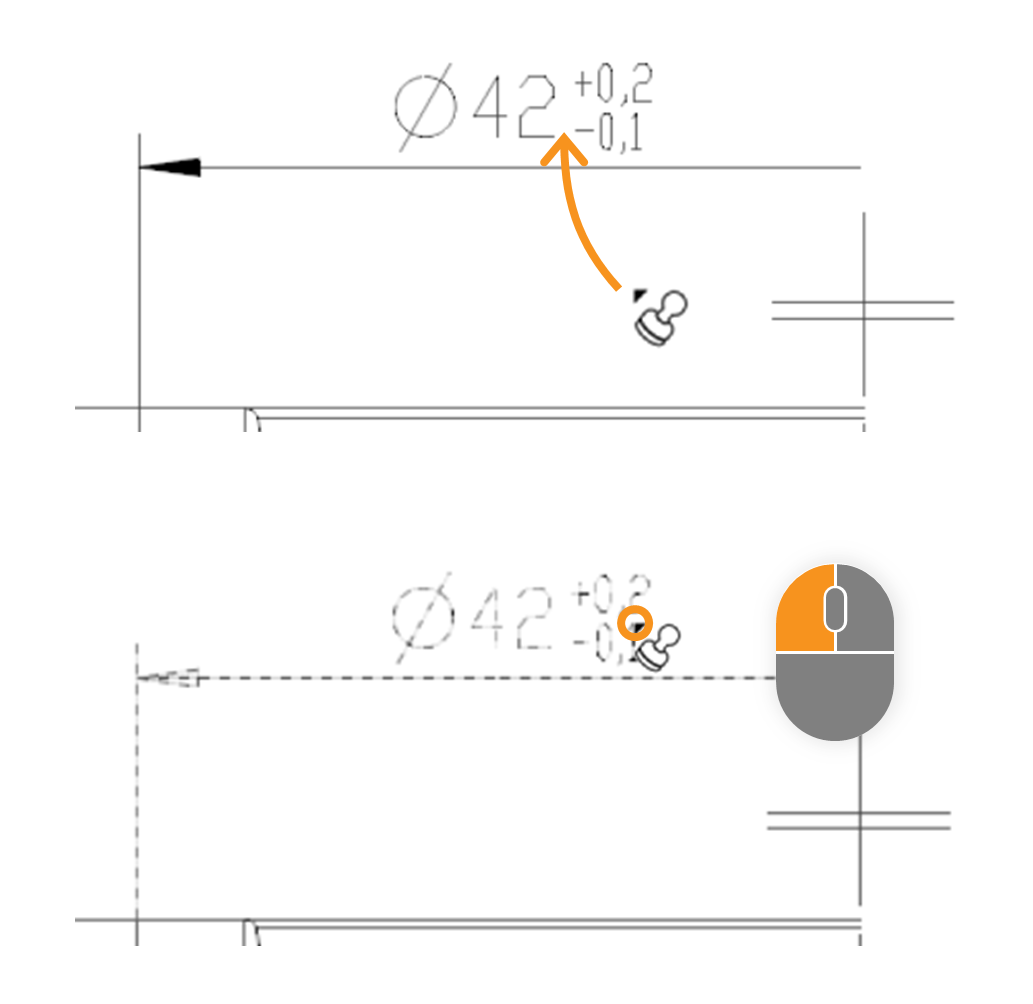 | In the expample the size “□86” is stamped. After stamping, it received a stamp with the number “1” and appears as an entry in the characteristic overview: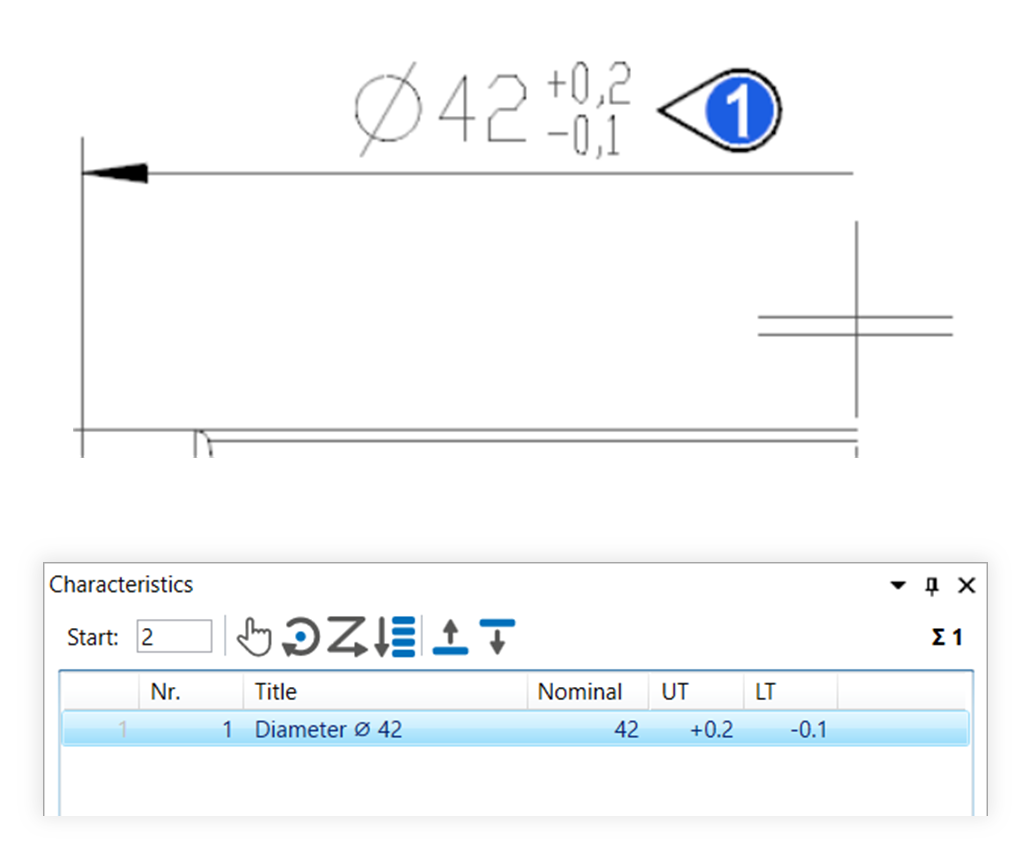 |
| 4b | Stamp area | Move the mouse pointer (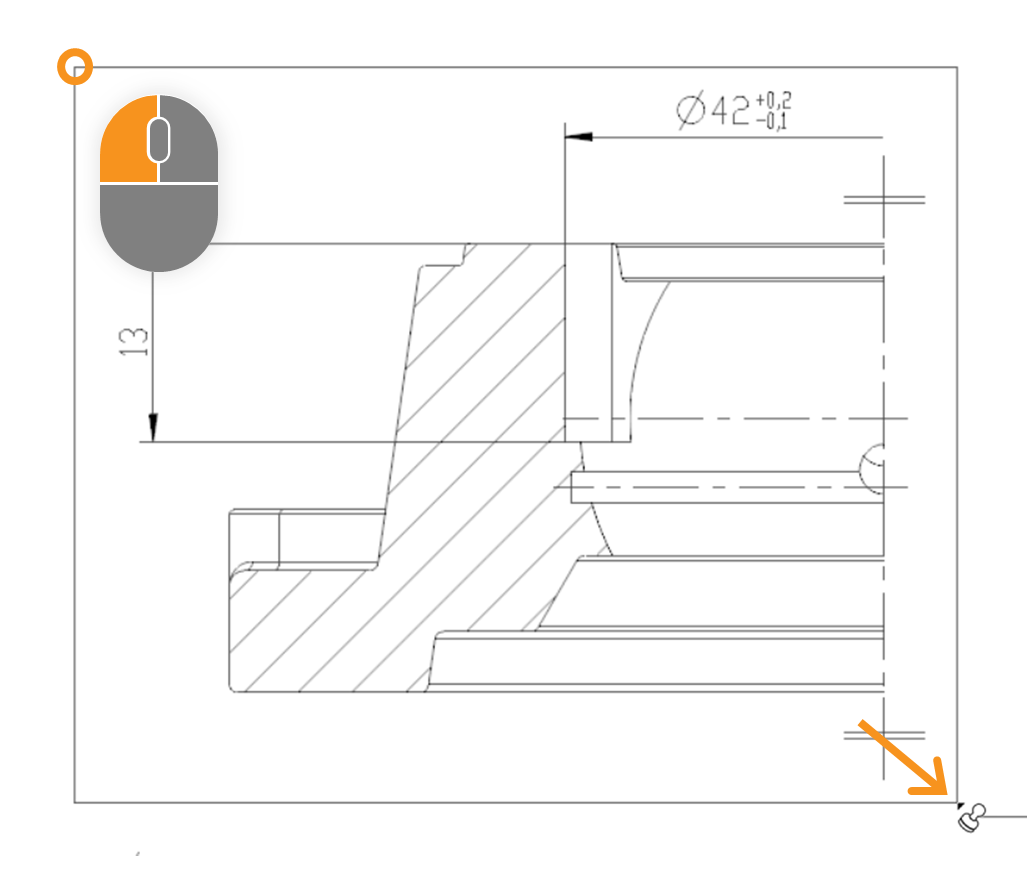 | After stamping, all relevant characteristics of the area received a VDA stamp with numbers from “1” to “7” and appear as an entry in the characteristics overview: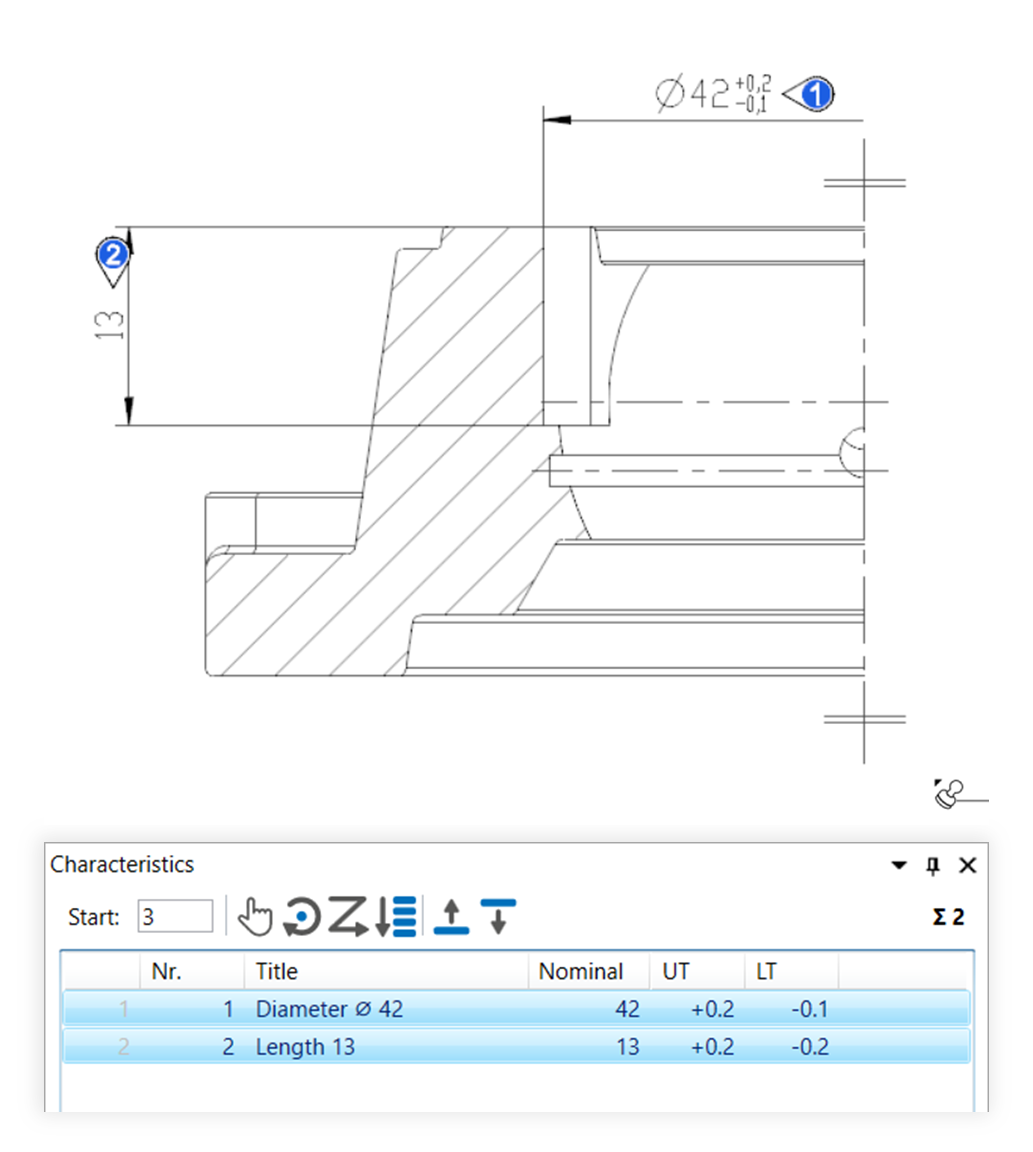 |
The function can be influenced via the following settings:
Creating characteristics
Change settings for creating characteristics.
See Settings > Settings > Characteristics
General tolerance tables
Change the underlying general tolerance tables, from which tolerance values for non-individually tolerated measurements are applied.
See Settings > Project settings > Tolerance tables
Stamp settings
Change underlying settings for stamp.
See Settings > Settings > Stamp
Stamp templates
Change the graphical display of the stamp.
See Settings > Project settings > Stamp templates